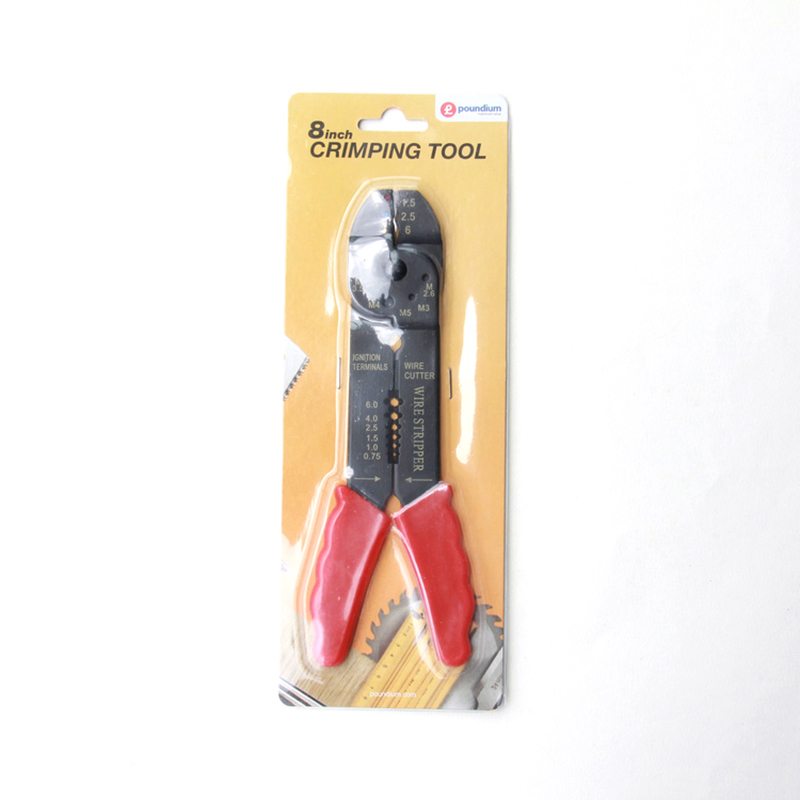
Professional High Quality Wire Strippers & Cable Cutters with single color handle Manufacturer in Manchester
Short Description:
Product Detail
Product Tags
With a positive and progressive attitude to customer's interest, our company continuously improves our product quality to meet the needs of customers and further focuses on safety, reliability, environmental requirements, and innovation of
Professional High Quality Wire Strippers & Cable Cutters with single color handle Manufacturer in Manchester, As we are moving forward, we keep an eye on our ever-expanding product range and make improvement to our services.
Basic Information
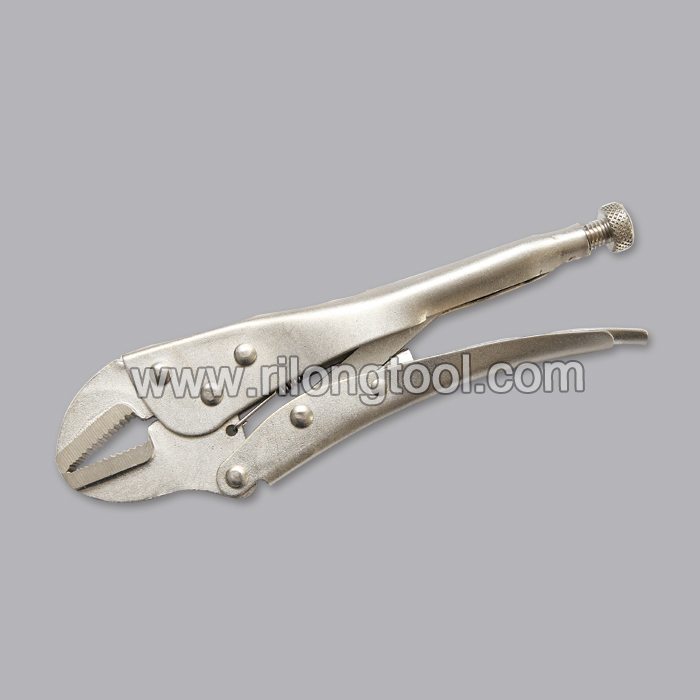
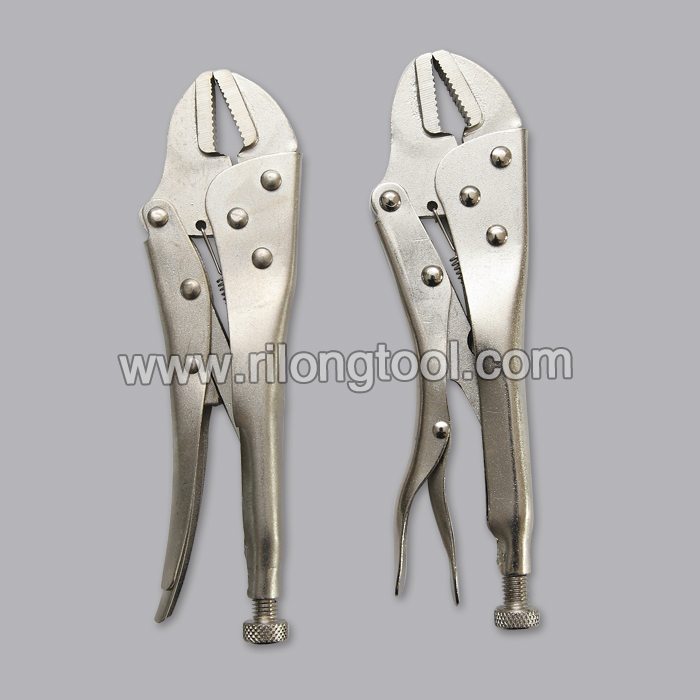
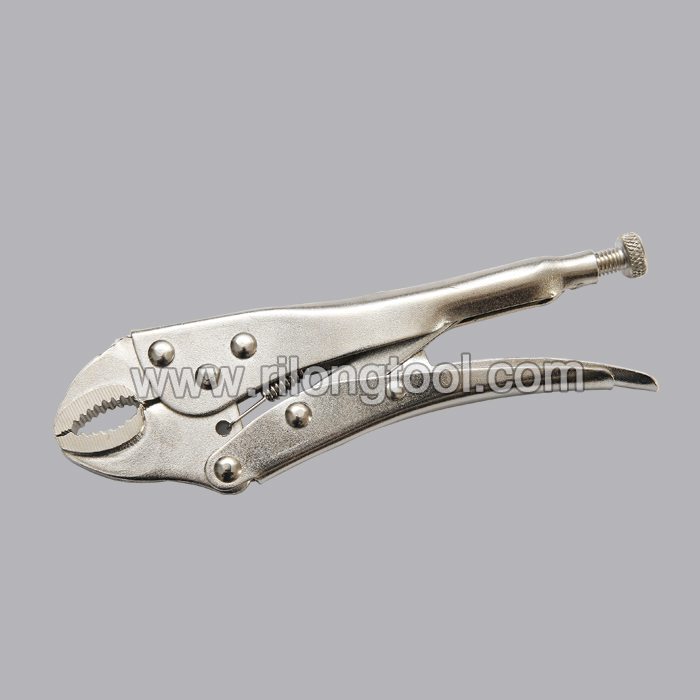
■Model Number: RL-YXQ001A
Additional Information
■Material: A3# Steel
■Size: 8”
■Surface Treatment: Coated
■Handle: PVC
■Color: Optional
■Package: Insert Card
■OEM: Acceptable
■Samples: For FREE
■Delivery Time: Always 30 working days depending on the order quantity
■Packing: By standard cartons
Product Description
■Ningbo Rilong Hardware Tools Factory, can provide various kinds of hardware tools.
Product Image
https://chevroletforum.com/how-tos is the leading Chevy Silverado resource for technical DIY guides. Learn how to properly lower your truck with help from this video. For the full step-by-step article, please visit https://chevroletforum.com/how-tos/a/chevrolet-silverado-2007-2013-how-to-lower-your-truck-391150
This job takes three to five hours and costs from $500 to $1,000 or more. A professional will charge $300 to $600 for labor.
This job requires a socket set, ½” ratchet, ½” extensions, a wrench set, hammer, impact wrench, breaker bar, pry bar, spring compressor, electric or air powered saw and drill, cut-off wheel, vice grip pliers, tie rod puller or pickle fork, ball joint removal tool, hammer, floor jack and jack stands, and safety glasses.
Step One – Raise truck and remove wheels
Set the e-brake. If you are not using an air or electric powered impact wrench, loosen lug nuts with wheels on the ground.
Use floor jack to raise one corner at a time, positioning a jack stand at each corner below the frame rail. Remove lug nuts and wheels.
Step Two – Remove the sway bar end links
Remove the end links by using a wrench to hold the nut on the top of the end link in place. Then use a socket to rotate the bolt on the bottom side counterclockwise.
Step Three – Remove the coil springs and/or strut assemblies
For those changing their shocks and/or strut assemblies, begin removing the strut by loosening the three 18 mm nuts holding the top of the strut in place. One nut has a clip over it attached to a wiring harness. Remove the clip by lifting it off the nut. Remove the two bolts securing the bottom of the strut with a 15 mm socket.
Afterwards, the strut can be wiggled down and out of the truck. To remove the coil spring from the strut assembly, use a spring compression tool.
After the spring is compressed, loosen the center nut at the top of the strut and hold the shaft in place with a pair of vice grip pliers. Refer to your kit’s specific instructions for the exact procedure during this step.
Step Four – Remove the tie rods from the spindles
The tie rods have tapered ends that are secured to the spindle by nuts. Once these nuts are removed, you will need to use either a tie rod puller or pickle fork to unseat the tie rod from the spindle.
Step Five – Separate the upper and lower ball joints from spindle
The ball joints have tapered ends that slide through the spindle and are held in place by a nut.
Like the tie rod removal, a ball joint removal tool is made that reduces the risk of damaging the ball joint. If you do not have access to one, you can use a pickle fork, although this may tear the ball joint rubber boot.
Step Six – Install the drop spindles and strut assemblies
Your new drop spindles will slide right into place onto the ball joints between the control arms. Tighten the ball joint nuts down, and then install the tie rod ends in the same fashion.
Slide the struts into position and start the three 18 mm nuts at the top. Then, tighten the bottom of the strut to the lower control arm with the two 15 mm bolts.
Re-attach your sway bar end links to the sway bar and lower control arm.
Step Seven – Remove rear shocks
Begin the rear installation by supporting the rear axle. This should be done with jack stands, but keep the floor jack close by.
Loosen the two 21 millimeter bolts at the top and bottom of the shock. The bottom bolt will require using a wrench to keep the nut from spinning in place.
Step Eight – Remove leaf springs
Two U-bolts secured by nuts hold the leaf springs to the rear axle.
The leaf spring itself is held onto mounts attached to the frame rail by one bolt at each end. Remove leaf spring after unbolting.
Step Nine – Install new leaf spring mounts and shackles
The new leaf spring mounts will surround the rear axle from the bottom, and the leaf springs will be secured to the bottom of the mounts by the U-bolts. The adjustable spring shackles will mount in place of the originals.
Some kits include shackle hangers. The original shackle hangers are riveted to the frame. The rivets will need to be ground off of the hangers for removal.
Step Ten – Install rear axle flip kit
Axle flip kits that allow larger drops require notching frame rails. Remove brake lines and sections of wiring from the frame in the area where you will be cutting/drilling.
Use the flip kit plate included in your kit to trace the area on the frame rail you will need to remove. Cut the frame rail using a cut-off wheel and electric saw. Drill new holes into the frame that correspond to the same size as the bolts you will be using to secure the notch plate to the frame.
The rear axle can now be lifted into position, and the leaf spring can be tightened into place at the shackles and U-bolts. Install the new extended rear shocks.
Tighten all hardware. Fully move the front spindles side to side. Attach wheels and lower truck.
Sales-priced B000JNRPRO/?tag=iphonevx-20 IRWIN Tools VISE-GRIP Groove Joint Pliers, Curved Jaw, 6-Inch (2078506) in stock. Great on going deals for IRWIN Tools VISE-GRIP Groove Joint Pliers, Curved Jaw, 6-Inch (2078506).