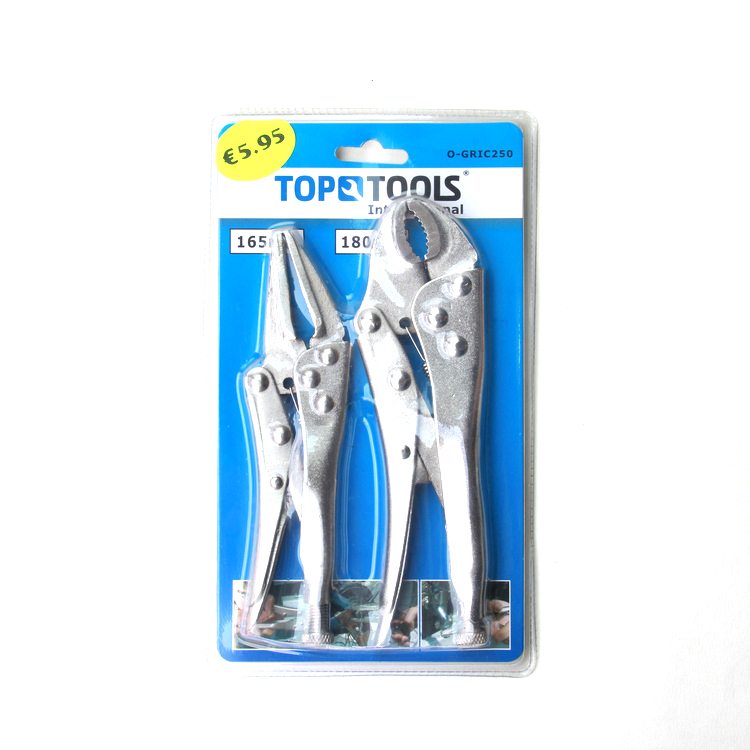
Professional High Quality 10″ Backhand Flat-nose Locking Pliers with Jackets Export to Nairobi

Short Description:
Product Detail
Product Tags
Gaining customer satisfaction is our company's aim forever. We will make great efforts to develop new and top-quality products, meet your special requirements and provide you with pre-sale, on-sale and after-sale services for Professional High Quality 10″ Backhand Flat-nose Locking Pliers with Jackets Export to Nairobi, "Passion, Honesty, Sound service, Keen cooperation and Development" are our goals. We are here expecting friends all over the world!
Basic Information
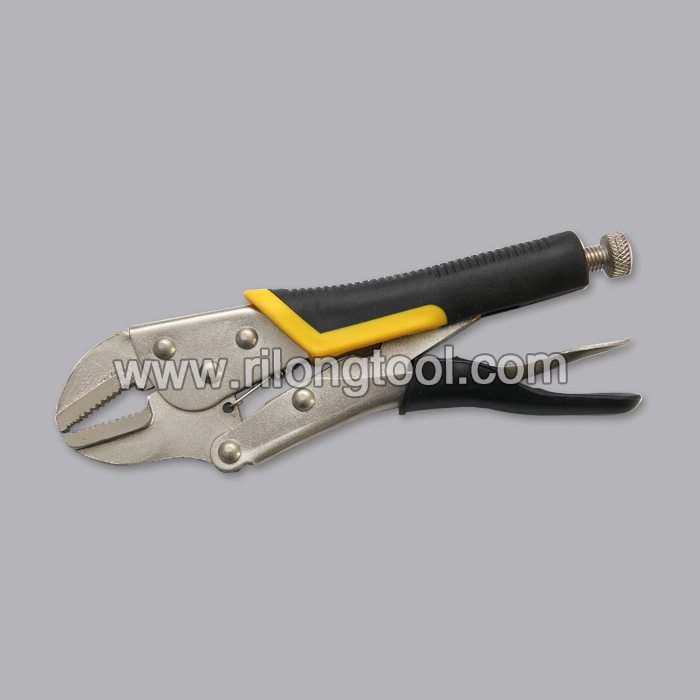
■Model Number: RL-DLQ015
Additional Information
■Material: A3# steel (Q235) or 45# steel
■Size: 10”
■Surface Treatment: Nickel-plated, Zinc-plated, Black Oxide, Electrophoresis
■Heat Treatment: Optional
■Package: Blister Card, Suction Card, Tie Card, Double Blister Card
■OEM: Acceptable
■HS Code: 8203200000
■Samples: For FREE
■Delivery Time: Always 30 working days depending on the order quantity
■Packing: By standard cartons
Product Description
■Mainly used for clamping parts to rivet, weld, grind and so on, which is characterized by the powerful clamp force produced by the jaw. It can lock tight so that the parts won’t fetch away. Besides, jaws have a lot of levels to adjust for the use of different thickness of parts, and it also can be used as a wrench.
■Flexible using, long life and good tenacity.
■The screw tuning button can give the best clamp size easily.
Product Image
Set out the necessary tools, drain the hydraulic oil from the cylinder, remove the fittings, then firmly secure the cylinder while being careful not to collapse or crush the barrel.
Plan on this being a two-person project.
After placing cloths over the ports to absorb remaining oil, slowly pull the rod until the piston touches the gland.
Locate the snap ring and index it so you can see both holes in their proper position for the snap ring pliers. This may require a hammer and punch.
Protect the rod from possible dings or dents, then insert the pliers into the snap ring holes and compress the snap ring.
Using a dead blow hammer, tap on a cross bar until the snap ring pops out.
Turn over the cylinder at this point and push the rod a few inches into the cylinder.
Now you’re ready for the final extraction of the rod by pulling it straight out, being careful to support it to prevent injury to yourself or others. Do not let it fall or swing like a pendulum into your leg. The larger the cylinder the more demanding this will be so keep that partner handy and ready to provide additional support and control as the rod assembly emerges.
Follow the proper repacking steps when replacing the seal backups and O-rings, taking special care to not damage the cast iron piston ring or the rod. Note the brass plates on our vice to protect the chromed rod.
Begin reassembling with the ports once again facing up and lined up inside and out. Use hydraulic oil for lubrication and a rubber mallet to tap the piston and gland assemblies back into the barrel. Frequently check the open port for O-ring extrusions or any signs of O-ring damage from this process.
Now, use the special pliers to once again compress the snap ring and tap it past the tip of the tube until the snap ring seats in the groove. Visually confirm the snap ring is in place by confirming the presence of a gap between the open ends of the snap ring.
Take the time to test for any internal or external leaks before reinstalling the repaired cylinder.
Prince Manufacturing Corporation…providing unsurpassed support for our customers. Be sure to visit our web site for detailed Parts Manuals and product catalogs and take a moment to like this video if you found it helpful. Make sure you subscribe to our channel so you’ll be notified of our latest videos.
GAHH finally supplied the new rear seat covers and I began installation of the rear headrests and bolsters. This video describes my experience so far including some tools and techniques.