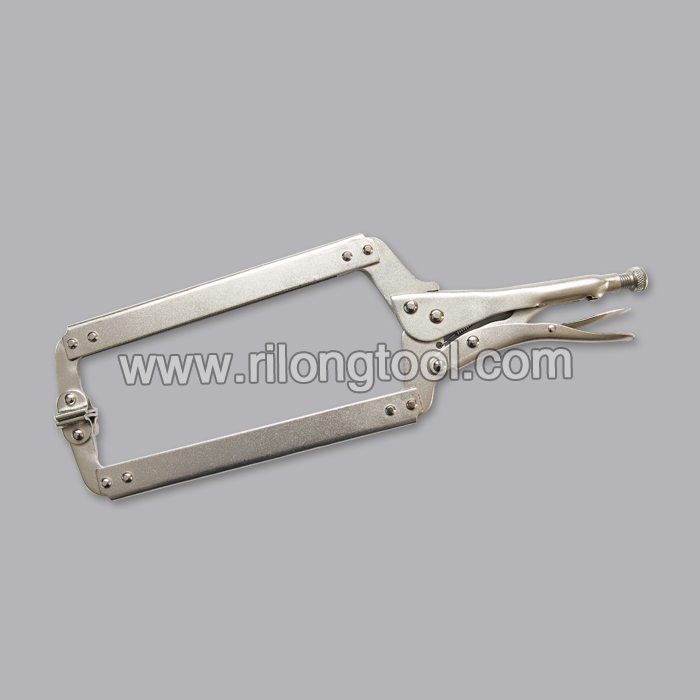
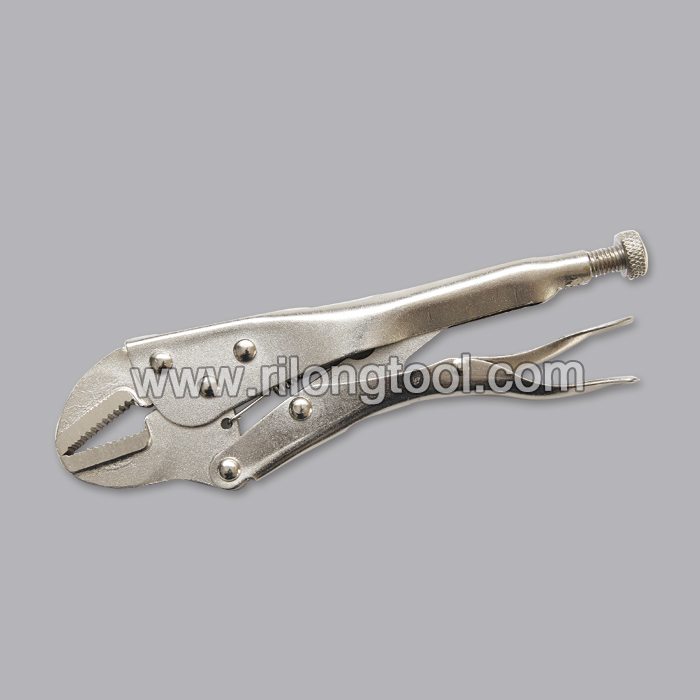
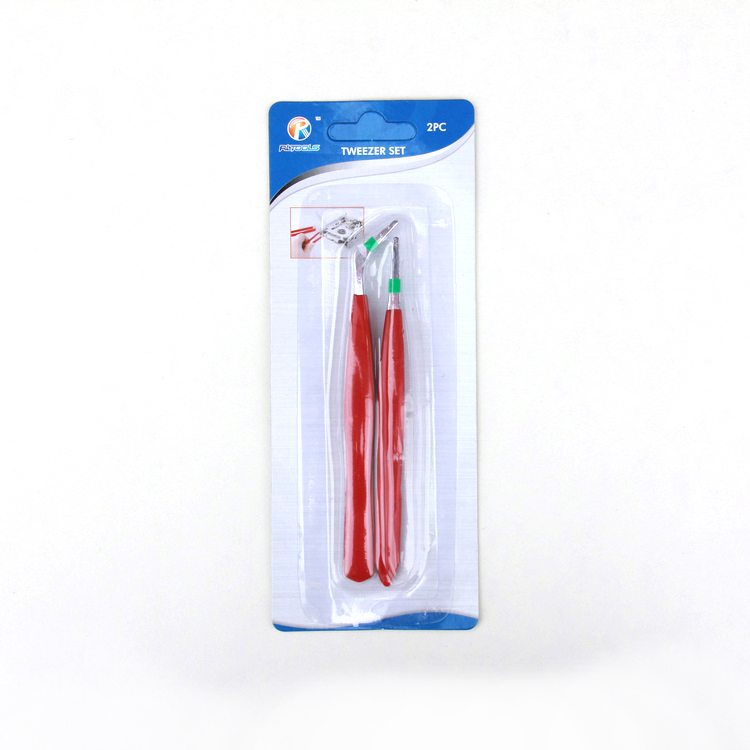
Online Manufacturer for 2-PCS Anti-static Tweezer Sets Manufacturer in Hamburg
Short Description:
Product Detail
Product Tags
Our company promises all users of the first-class products and the most satisfying post-sale service. We warmly welcome our regular and new customers to join us for Online Manufacturer for 2-PCS Anti-static Tweezer Sets Manufacturer in Hamburg, As we are moving forward, we keep an eye on our ever-expanding product range and make improvement to our services.
Basic Information
■Model Number: RL-NZ001B
Additional Information
■Material: Q195 Cold-rolled Steel
■Thickness: 0.8mm, 1.0mm, 1.2mm
■Surface Treatment: Chrome Plated
■Finish: Polished
■Package: Suction Card
■OEM: Acceptable
■HS Code: 8203200000
■Samples: For FREE
■Delivery Time: Always 30 working days depending on the order quantity
■Packing: By standard cartons
Attention
■Do not heat it.
■Do not take acid drugs with it.
■Keep it clean after using it.
Product Image
I didn’t talk during the video so I could concentrate on cutting. I did the 1st cut with a 48″ CRL Production Speed Cutter. I made the other cuts with a hand held oil filled cutter to show it is still easy with a hand held. Also in case you can’t afford a high end cutter like the Production cutter. If you are going to cut a lot of glass it is well worth the money.
As you can see in the video I used a pair of CRL Running Pliers. They are a must have as you can see in the video. They make cutting glass a piece of cake.
I did play around a little bit in the video by cutting a round edge. You would finish it with a disc sander to make it nice and round.
All the glass in the video is 1/4″. I cut 3/8″ plate glass the same way, except I use a different degree cutter. I use a 154 degree cutter for 3/8″.
I hope this video helps you with your glass cutting.
Hand held cutter used in video: https://bit.ly/UyqXvx
Running pliers used in video: https://bit.ly/WQrkg3
Use this knowledge only for good, not evil!
The CIA Lockpicking Manual: https://amzn.to/1NqJe82
Visual Guide to Lock Picking (Third Edition) Perfect Paperback: https://amzn.to/1P1p6K1
9-Piece Unlocking Lock Pick Set Key Extractor Tool: https://amzn.to/1R1DQWL
Leather Packing Titanize Scissors And Single Hook: https://amzn.to/1Pk8Pij
Mything(TM)Professional Cutaway Practice Crystal Padlock+Lock: https://amzn.to/1jeKU7W
Watch more Home Security & Safety videos:
Locked yourself out of the house? Most common pin and tumbler locks can be picked with a little luck and finesse—so before you call a locksmith, try this.
Warning
Only pick your own locks—or you could wind up in a lot of trouble.
Step 1: Get a paperclip
Get a paperclip or safety pin and bend it straight. Now make a slight upwards bend at the very end.
Tip
You can buy a professional lock pick set at a hardware store. There is a basic size intended for American locks.
Step 2: Insert the wrench
Insert your wrench into the lower part of the keyhole—that is, the side opposite the one where the key’s teeth would go in.
Step 3: Determine direction
Figure out which way the lock needs to be turned to open by turning the wrench clockwise and then counterclockwise. You’ll feel which way has more give.
Step 4: Turn the lock
Turn the lock the correct way with the wrench, putting slight pressure on it. Hold the wrench in place.
Step 5: Insert the paperclip
While keeping pressure on the lock, insert the end of the paperclip into the top part of the keyhole.
Step 6: Feel for pins
Feel around the keyhole with the paperclip until you locate the pins. If you’re picking a common door lock, there will most likely be at least five of them in a row.
Tip
Before you start, many experts suggest ‘raking’ the lock. Straighten your second paperclip, put a few bends at the wire’s end, and—with no pressure on your wrench—shove it to the back of the lock. Now pull it out quickly, pressing against the top of the lock while gently turning your wrench. You might just set a pin or two that way.
Step 7: Push up
Now for the actual ‘picking.’ One at a time, push each pin up with the paperclip. Try to feel for the moment when the pin reaches its ‘unlocked’ position. You should feel a slight give—or even hear a faint click.
Tip
Start with the pin furthest away from you—then move on to the next.
Step 8: Increase the pressure
As you go, apply slightly more pressure with the wrench until you have all the pins lifted up.
Step 9: Turn the wrench
Now turn the wrench fully. Voila! The lock will pop open.
Did You Know?
Wooden locks were used as far back as 4,000 years ago in ancient Egypt.