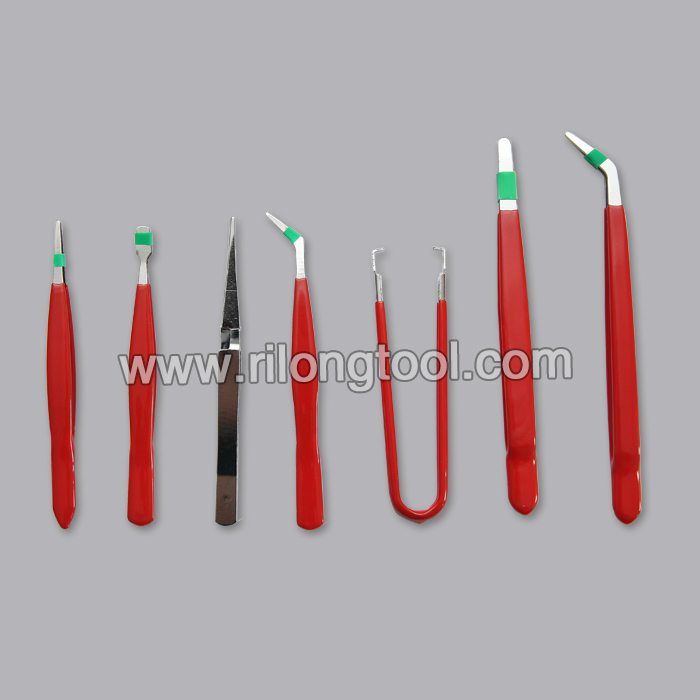
OEM/ODM China 7-PCS Anti-static Tweezer Sets Jordan Manufacturer
Short Description:
Product Detail
Product Tags
We are commitment to offer the competitive price ,outstanding products quality, as well as fast delivery for OEM/ODM China 7-PCS Anti-static Tweezer Sets Jordan Manufacturer, "Passion, Honesty, Sound service, Keen cooperation and Development" are our goals. We are here expecting friends all over the world!
Basic Information
■Model Number: RL-NZ007
Additional Information
■Material: Q195 Cold-rolled Steel
■Thickness: 0.8mm, 1.0mm, 1.2mm
■Surface Treatment: Chrome Plated
■Finish: Polished
■Package: Suction Card
■OEM: Acceptable
■HS Code: 8203200000
■Samples: For FREE
■Delivery Time: Always 30 working days depending on the order quantity
■Packing: By standard cartons
Attention
■Do not heat it.
■Do not take acid drugs with it.
■Keep it clean after using it.
Product Image
The Wychwood Crimp tool enables you to create short hook sections and rig booms with ease, and without wasting material. Crimps negate the need to tie fiddly knots and they come in three sizes for differing material thicknesses. Check out this video to get the full run down of the Crimp Tool from Wychwood’s Rick Hurley – available for £9.99.
Web: https://www.wychwoodcarp.co.uk
Fb: https://www.facebook.com/Wychwoodtackle
Ig: https://www.instagram.com/wychwoodcarp
T: https://twitter.com/Wychwoodcarp
How to do-it-yourself on renewing an antenna’s coaxial (shielded) cable connection.
Transcript provided for the hearing impaired:
Alright so today on Repairs101 I’ve got a frayed piece of coaxial cable on a two-way radio antenna that needs repairing.
OK so here’s the deal: coax is used on electronics like two-way radios, radar and something called television.
Now here’s a sample I put together, really the tip should be soldered as well as the shield should be soldered to the fitting.
This is what a bad installation looks like. I guess he was in a hurry or something, I don’t know. So I cleaned it up and I dismantled it. I had a heck of a time getting this plug out. (There it goes!)
Obviously the wire needed to be fresh-ended. So I marked the wire for the core and the shield — just the same as the old wire. Once the end is prepped you want to slip on a shrink tube.
Next I took a terminal and I bent the ring back and then I spread apart the saddle a little bit. I put it all together and spread the shield away from the dielectric. Be sure your dielectric is cut so that it’s flush to avoid any signal leakage.
I trimmed the ring off, then I gave the saddle a real good squeeze. Then a little solder here, a little solder there. A little solder there, too. So then shrink tube, two layers thick. And then last but not least was this little plug that I stuck on with some silicone.
Finish up with a continuity test from the antenna to the core and again from the fitting to the base.
Alright, thanks for watching and don’t forget to subscribe!