Manufacturer for Wire Strippers & Cable Cutters with single color handle for USA Manufacturer

Short Description:
Product Detail
Product Tags
We have a highly efficient team to deal with inquiries from customers. Our goal is "100% customer satisfaction by our product quality, price & our team service" and enjoy a good reputation among clients. With many factories, we can provide a wide range of Manufacturer for Wire Strippers & Cable Cutters with single color handle for USA Manufacturer, Our aim is to help customers realize their goals. We are making great efforts to achieve this win-win situation and sincerely welcome you to join us
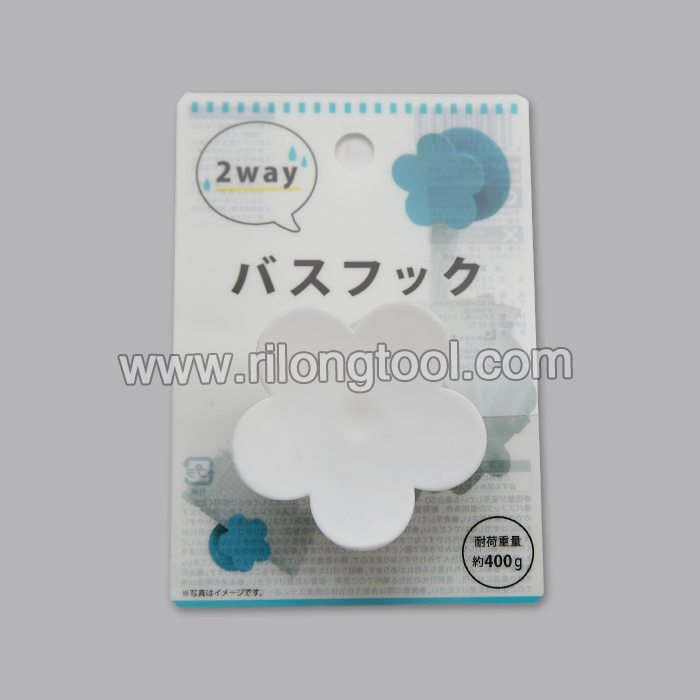
Basic Information
■Model Number: RL-YXQ001
Additional Information
■Material: A3# Steel
■Size: 8”
■Surface Treatment: Coated
■Handle: PVC
■Color: Optional
■Package: Suction Card, Tie Card, Insert Card
■OEM: Acceptable
■Samples: For FREE
■Delivery Time: Always 30 working days depending on the order quantity
■Packing: By standard cartons
Product Description
■Ningbo Rilong Hardware Tools Factory, can provide various kinds of hardware tools.
Product Image
The Craftsman portable clamping workbench is the innovative solution for making any project true DIY. This versatile tool combines a durable work surface in one foldable and easily storable unit allowing a wide range of clamping applications. Shop for clamping workbench here: https://www.craftsman.com/products/craftsman-portable-peg-clamping-workbench
Check out more Craftsman tools you need: https://www.youtube.com/watch?v=rt8knChtbRc&list=PLb35eseAI1U1UH1VQ7ZePmuBJxmkr1SsU&index=1
We upload new videos every week. Subscribe today:
https://www.youtube.com/subscription_center?add_user=craftsman
Website: https://www.craftsman.com/
Facebook: https://www.facebook.com/craftsman
Twitter: https://twitter.com/craftsman
Instagram: https://instagram.com/craftsman/
Pinterest: https://www.pinterest.com/craftsman/
Google+: https://plus.google.com/+craftsman/posts
This video is about the Craftsman portable clamping workbench.
Home Machine Shop Toolmaking, Machining A Small Lathe Carrier, by Clickspring.
Clock pillars are an awkward little part to hold and machine, once the tapered and curved sections have been formed.
Its best to hold them by the small spigot, to avoid marking the part. A standard lathe carrier is not suited to the job.
In this episode, I machine a custom lathe carrier to suit the task.
A great mini mill project, with some marking out, mill work, the belt sander and hand finishing.
Be sure to use breathing protection whenever using a belt sander.
If you would like to help support the creation of these videos, then head on over to the Clickspring Patreon page: https://www.patreon.com/clickspring
For more info on this tool build, as well as other tool making info, visit the blog site at https://www.clickspringprojects.com
Project Plans available from the Clickspring Store:
https://www.clickspringprojects.com/store.html
Other Videos to Watch:
How To Make A Clock Part 1 – Making The Clock Frames
Machining a JANSJÖ LED Work Lamp Adapter Plate
Ask Me A Question:
https://www.clickspringprojects.com/contact.html
Follow Clickspring:
https://www.facebook.com/Clickspring1
https://plus.google.com/u/0/113668471124073837794/posts
https://instagram.com/clickspring1/
https://www.tumblr.com/blog/clickspring1
https://twitter.com/clickspring1
https://www.patreon.com/clickspring
Transcript:
00:19 So I’m making the pillars for the John Wilding Skeleton clock and I’ve hit a little snag.
00:24 I’d like to do the ornamental turning between centers but if I use one of my standard carriers, at some point I’ll be clamping down on these curved sections, and I’m pretty sure that will mark the part, I think it would be better to drive it from the spigot, but I’ll need a different sort of carrier to do that. I saw a picture in a John Wilding book, of a carrier that will do the job. He calls it an “antique lathe carrier”
00:47 The thinned down section will grip short cylinders like the spigot, but still keep clear of the center and the thicker cross section at the outside can be drilled and tapped for a decent sized cap screw.
02:15 Actually I spent quite a bit of time thinking about how I was going to make this part, and eventually I figured it was probably best to start with the central hole, and then work on the perimeter. It took a bit of thought to come up with a sequence where I could make the cuts that I wanted, and still hold and locate the part
02:48 Then I milled away most of the waste stock from the perimeter so that I ended up with 2 flat surfaces on either side of the curve. My plan was to use those as a reference surface to locate the part horizontally in the vise later on in the process.
03:21 And you can see that I’ve left it quite a bit short of the line, mainly to give me a bit of metal to work with when I’m doing the final finishing. So with the bulk of the metal removed, I can get the curves into shape and I did that with the bench filer and the belt sander.
05:27 This one was a bit blunt and not quite long enough. So I had to nurse things along a bit to avoid chatter. I ended up with a bit more chatter than I was happy with towards the end of the cut. So I tried plunging down at full depth, and that seemed to do the job.
05:49 For the other side, I figured the plunge cuts worked so well, lets do that again, except this time it didn’t work so well. There wasn’t a huge amount of chatter and I was planning on hand finishing the surfaces anyway, but there you go; no more using blunt tools.
07:05 It worked out ok, but the cuts were slightly off. Luckily I had enough material to tidy up by hand so it didn’t matter. So first up a bit of belt sander time to tidy up that saw cut; and I don’t need those reference surfaces anymore so they can be taken to the line too.
07:39 There’s a few fancy end curves to put in and just a little bit of filing and sanding, to take off the rough edges and give it a presentable surface finish.
07:59 Its still got to look good, at least until it gets all banged up. I softened the edges a bit too, some of those were still a bit sharp, and want them completely dull.
09:07 And here it is about to do its first job. I’m glad I finally got around to making this. 1/4″ seems to be a standard size for pillar spigots so with a bit of luck you’ll see this carrier pop up in plenty of future video’s
References:
John Wilding picture of an Antique Lathe Carrier
“Tools For The Clockmaker And Repairer Part 2″ pg 27
https://www.ritetimepublishing.com/
Music: “Pilot Error” – Kevin Macleod – https://incompetech.com/music/
Home Machine Shop Toolmaking, Machining A Small Lathe Carrier, by Clickspring.