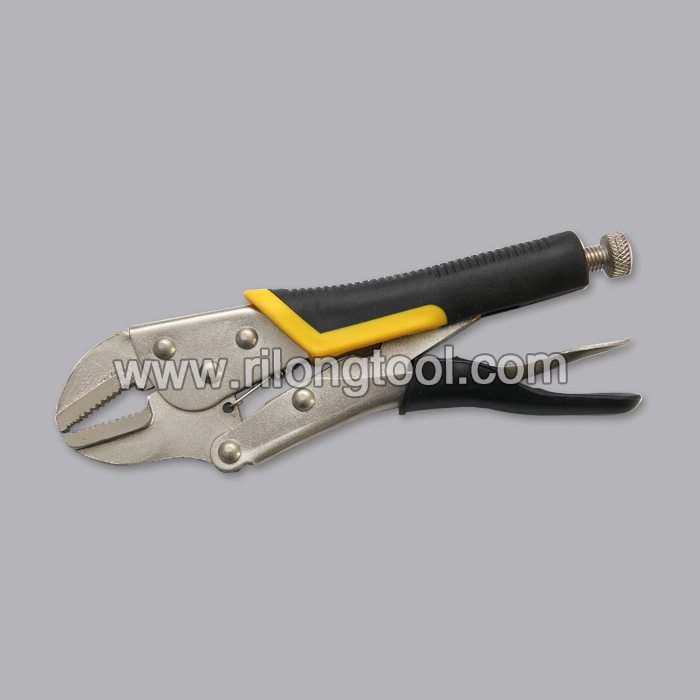
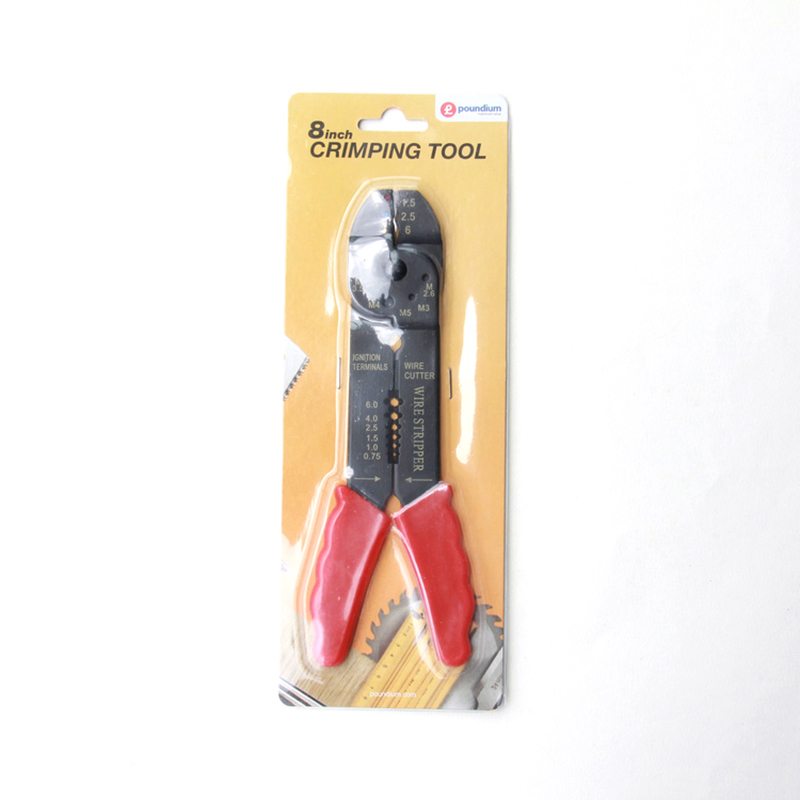
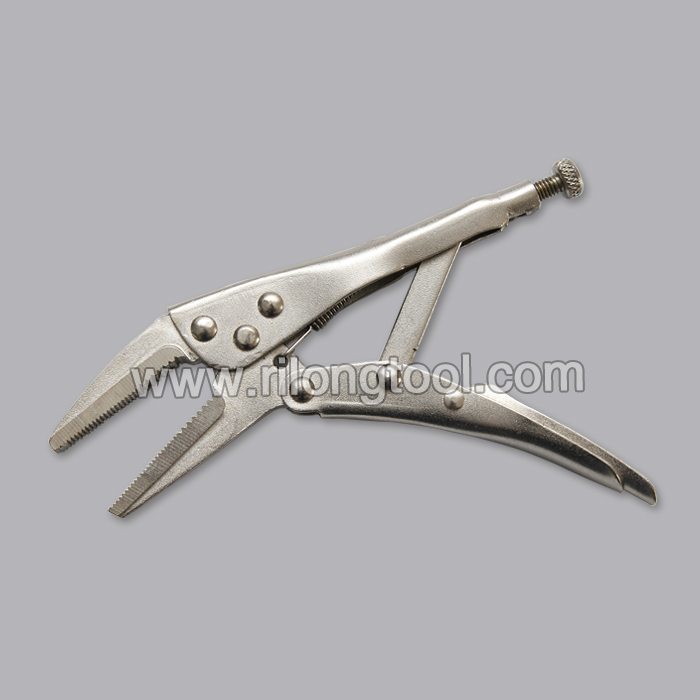
High Quality Industrial Factory 6.5″ Forehand Long-nose Locking Pliers to Brasilia Factory

Short Description:
Product Detail
Product Tags
Our company insists all along the quality policy of "product quality is base of enterprise survival; customer satisfaction is the staring point and ending of an enterprise; persistent improvement is eternal pursuit of staff" and the consistent purpose of "reputation first, customer first" for High Quality Industrial Factory 6.5″ Forehand Long-nose Locking Pliers to Brasilia Factory, Welcome friends from all over the world come to visit, guide and negotiate.
Basic Information
■Model Number: RL-DLQ007
Additional Information
■Material: A3# steel (Q235) or 45# steel
■Size: 6.5”
■Surface Treatment: Nickel-plated, Zinc-plated, Black Oxide, Electrophoresis
■Heat Treatment: Optional
■Package: Blister Card, Suction Card, Tie Card, Double Blister Card
■OEM: Acceptable
■HS Code: 8203200000
■Samples: For FREE
■Delivery Time: Always 30 working days depending on the order quantity
■Packing: By standard cartons
Product Description
■Mainly used for clamping parts to rivet, weld, grind and so on, which is characterized by the powerful clamp force produced by the jaw. It can lock tight so that the parts won’t fetch away. Besides, jaws have a lot of levels to adjust for the use of different thickness of parts, and it also can be used as a wrench.
■Flexible using, long life and good tenacity.
■The screw tuning button can give the best clamp size easily.
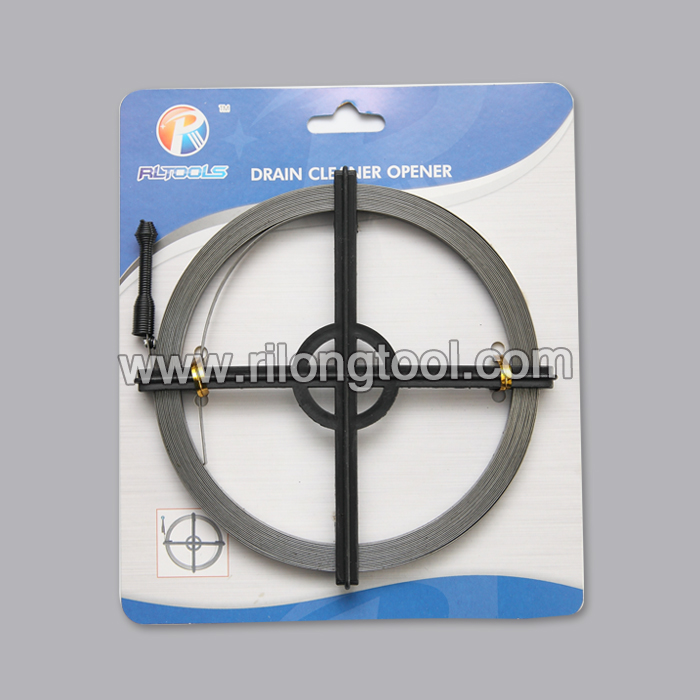
Product Image
CLICK SHOW MORE FOR PROCEDURE
Showing how great the envirotex lite looks on my cheap starter bass defret. Very little sanding and work for a great looking and performing finish.
To see what a completed fretless guitar would look like with a matte finish:
https://picasaweb.google.com/flyingaero/DefrettedFretlessESPF200Guitar
My Procedure:
RECOMMENDED: Remove the Neck if you can. Itll save your bass body some damage.
1. Find a very thin flat head screwdriver/chisel and some pliers/end nippers
2. Slide the screwdriver under the corner of the fret and gently push it up
-If it seems like its not budging, wiggle it around and try one of the other 3 corners, it may be looser.
3. As soon as you can grab the fret with the pliers, do so and SLOWLY lift the fret with the pliers using the screwdriver to help loose it.
-In my experiences, its near impossible to prevent chipping, but going slowly helps a lot.
-If you see a chip forming and have a spare tool you can push down on the chip to prevent it from getting bigger.
4. When you have removed all the frets, press the chips back into place and put wood glue over the fret lines.
-Just enough to cover the lines!
5. After the glue has dried, sand the neck until smooth.
-Chips may pop up from the sanding. Dont fret (teehee) over them too much
6. Use a knife to clean out the glue and wood
-Make sure the knife isnt wider than your fret holes!
6. Mask off the neck with painters or masking tape.
- Basically tape around the fret lines to protect the wood, but leave the fret holes open
7. Using super glue (or wood putty, or wood glue and thin wood veneers), fill the fret holes.
-If super glue gets on a random part of your fretboard, you may have to sand off a ton in order to get it to stop showing.
7 OPTION. The fretless guitar had solder lines to look like frets. Heres how I did it (WARNING: Its exhausting on your hand)
- Cut solder about as long as the fret line you are preparing.
-Use pliers (bigger is easier) to flatten the solder as much as is needed to snuggly fit in the slot.
- Place glue in the fret slot, put the solder in, and hammer it down as far as it will go (I used the pliers)
- When the glue dries, sand the solder level with the neck (also exhausting)
8. Sand to your highest grit sandpaper
9. Mask the entire neck leaving only the fretboard uncovered(body also if neck through)
- Tape the ENTIRE side of the neck, even where the side of the fretboard with the dot indicators show.
OPTION- If you want your fret lines to be black, you can use a sharpie to color the lines and the pour wont affect them (what I did in the video)
10. Put the neck in a dust free room after dusting the neck (keep dusting up until your pour!)
11. Follow Envirotex Lite/Epoxy/Finish instructions on making the mix. Pour it on and exhale on the bubbles to make them rise and pop
-If they dont rise and pop, try again in a few minutes
12. After it has dried, Inspect the finish. There will probably be a few specks of dust that ended up landing. If its satisfactory, you can stop there. If not, buff it out, or sand, dust, and apply another coat.
13. OPTIONAL: FOR A MATTE FINISH
Put house hold oil on the finished fingerboard and rub it well with 0000 steel or copper wool
14. Lower your action and jam out with new fretless.
comment fabriquer un livre découpé et plié avec un patron de ma création avec seulement un vieux livre !