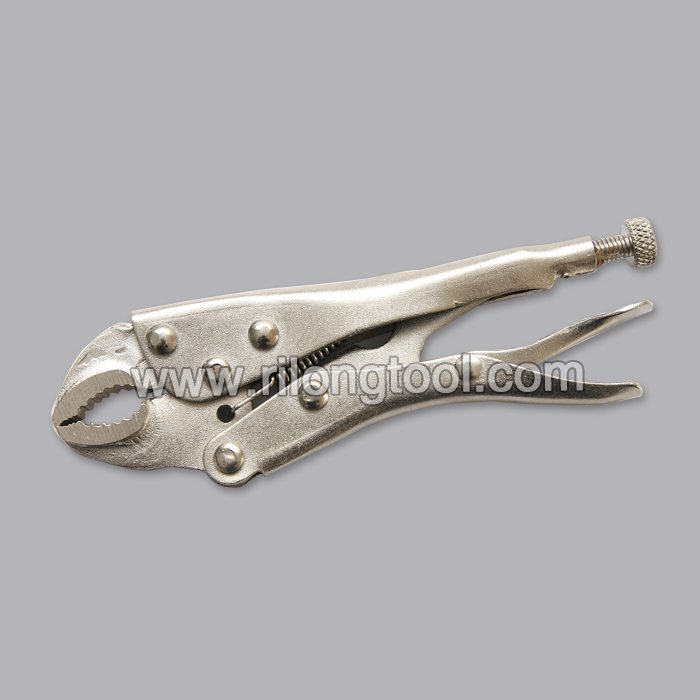
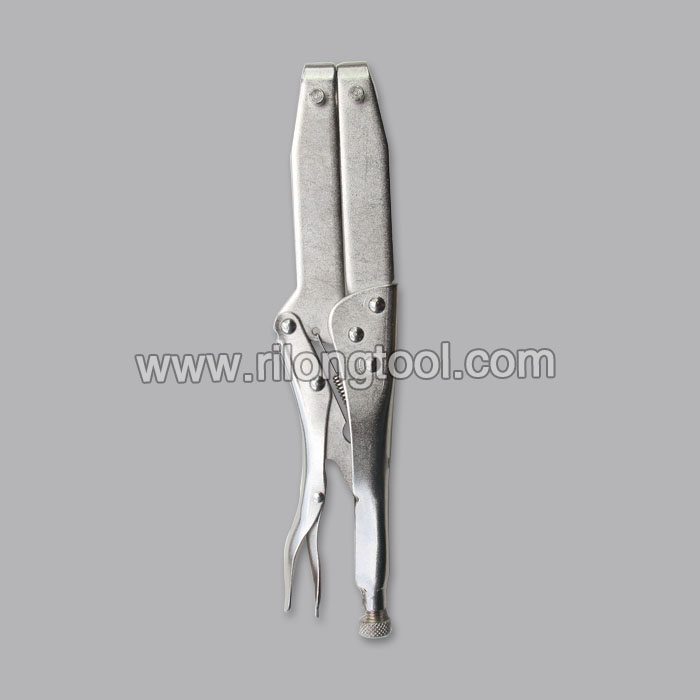
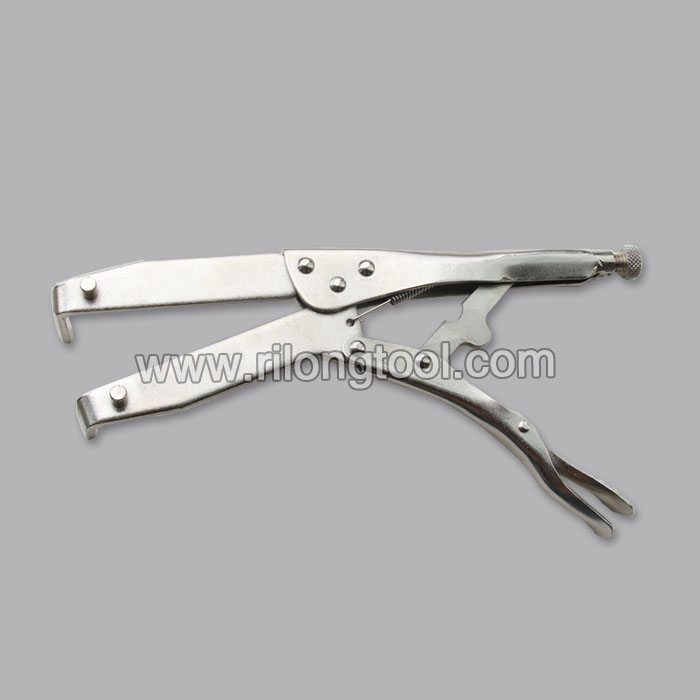
factory wholesale good quality 12″ Long Locking Pliers for Turkey Manufacturer
Short Description:
Product Detail
Product Tags
continue to improve, to ensure product quality in line with market and customer standard requirements. Our company has a quality assurance system have been established for factory wholesale good quality 12″ Long Locking Pliers for Turkey Manufacturer, Welcome to contact us if you are interested in our product, we will give you a surprice for Qulity and Price.
Basic Information
■Model Number: RL-DLQ016
Additional Information
■Material: A3# steel (Q235) or 45# steel
■Size: 12”
■Surface Treatment: Nickel-plated, Zinc-plated, Black Oxide, Electrophoresis
■Heat Treatment: Optional
■Package: Blister Card, Suction Card, Tie Card, Double Blister Card
■OEM: Acceptable
■HS Code: 8203200000
■Samples: For FREE
■Delivery Time: Always 30 working days depending on the order quantity
■Packing: By standard cartons
Product Description
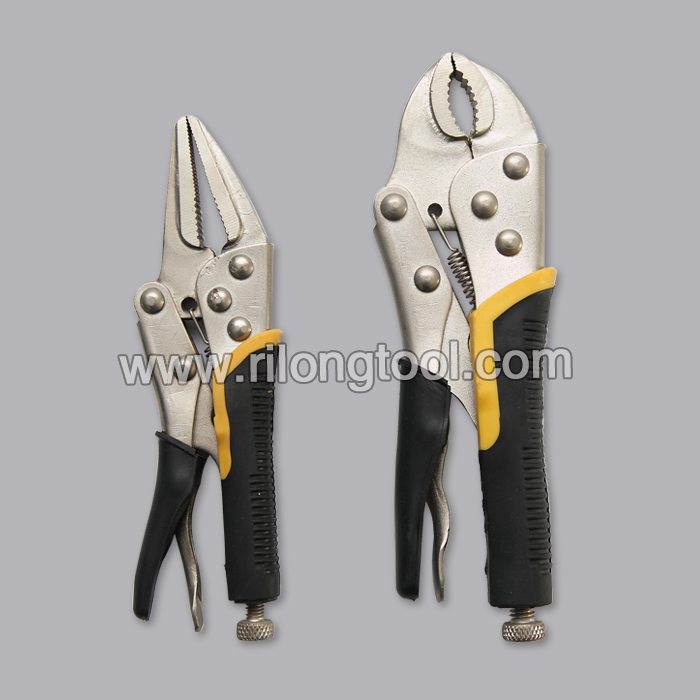
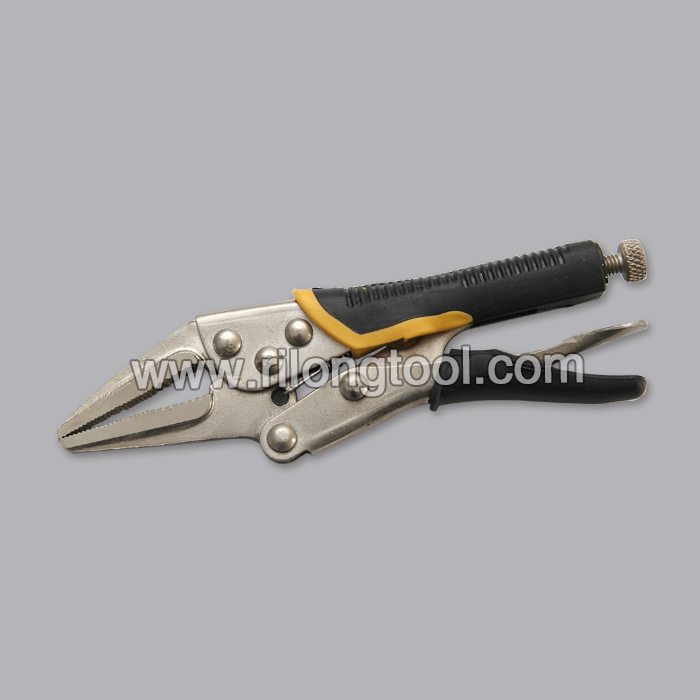
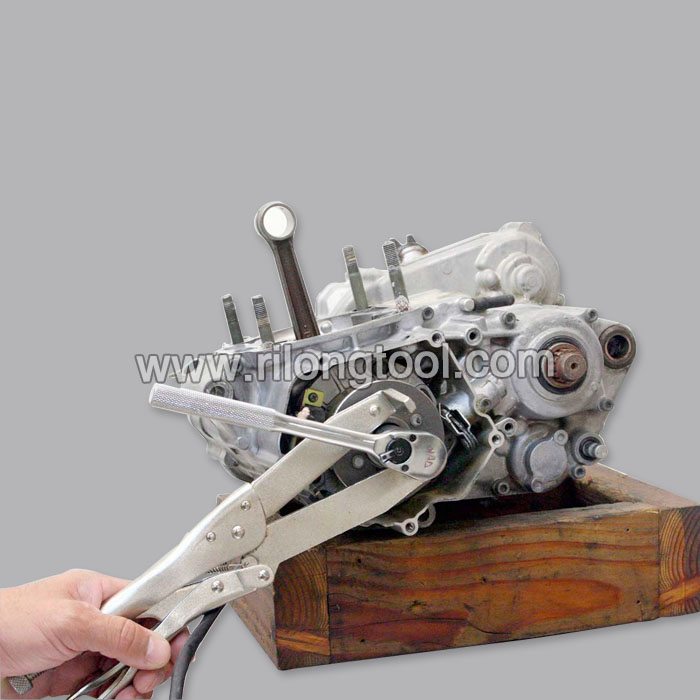
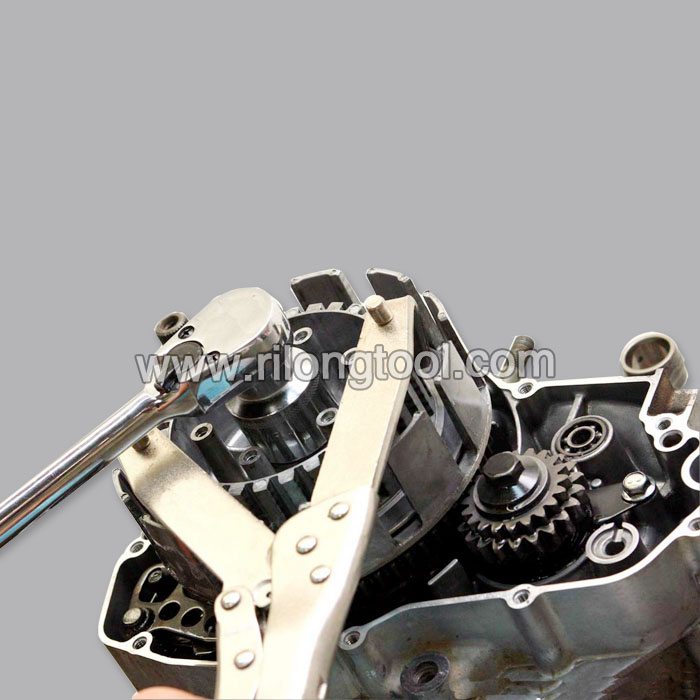
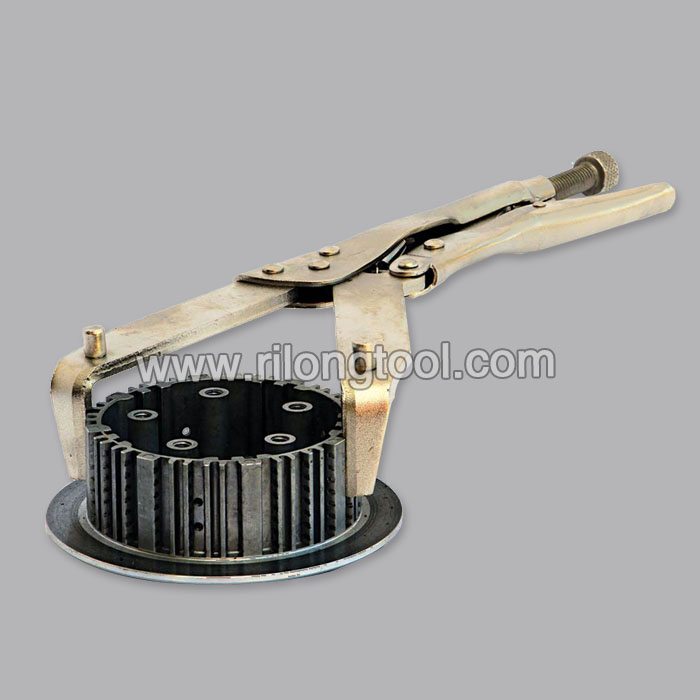
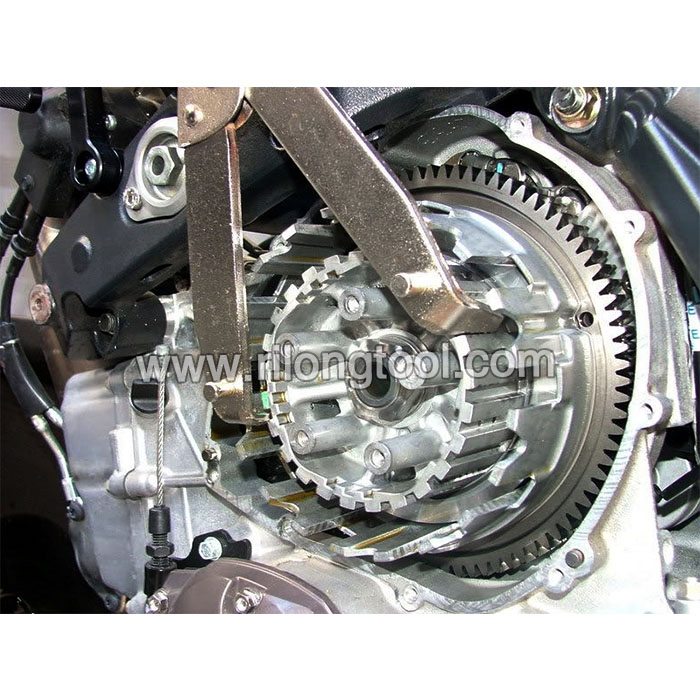
■Mainly used for clamping parts to rivet, weld, grind and so on, which is characterized by the powerful clamp force produced by the jaw. It can lock tight so that the parts won’t fetch away. Besides, jaws have a lot of levels to adjust for the use of different thickness of parts, and it also can be used as a wrench.
■Flexible using, long life and good tenacity.
■The screw tuning button can give the best clamp size easily.
Product Image
In this instalment Andy demonstrates how to use a pair of setting pliers to achieve the correct set for your saw.
FREE T-SHIRT – For a limited time, when you buy our latest design sausage gun (620AL-BLUFLAME) and post a picture/like us on Facebook, we will contact you and send you a free t-shirt. So pick one up at your local distributor (not available when purchasing through Amazon). If the distributor isn’t stocking the 620AL-BLUFLAME, just ask them to special order it for you.
YOU DECIDE – Which sausage gun design do you want to see added to Newborn’s line up? Vote on our website’s front page.
Website – www.NewbornCaulkGuns.com
Facebook – www.Facebook.com/NewbornCaulkGuns
CHECK OUT ALL THE COLORS AND DESIGNS! – https://newborncaulkguns.com/sites/default/files/Model%20620al%20colors%20sm_0.pdf
How To Load The Sausage Gun With A Sausage Pack:
1. Hold the back handle, press the thumb release, and pull the rod all the way back.
2. Slide the sausage pack into the gun and bring it right up to the edge.
3. Slit the sausage pack around the crimp with the tip of a knife.
4. Use your knife to cut an opening in the cone with the angle and size you want to create.
5. Place the cone inside the end cap and screw the end cap on the gun.
How To Change A Sausage Gun To A 10 Oz. Cartridge Gun:
1. Remove the barrel.
2. Loosen the set screw.
3. Remove the sausage only cup by hand.
4. Put the barrel back on.
5. Slide the 10 oz. cartridge into the barrel and screw the end cap back on.
How To Change The Sausage Gun To A Bulk Gun:
1. Remove the barrel.
2. Loosen the top set screw and remove the sausage only cup by hand.
3. Take the dual hytrel cup-conical ejector combination and screw it on. Leave the set screw loose.
4. Put the barrel back on the gun.
How To Use The Sausage Gun As A Bulk Gun (With A Follow Plate):
1. To open the metal bucket, use the pail lid opener to pry the tabs up.
2. Remove the plastic or any other sealant.
3. Push the follow plate down into the bucket until some material comes out of the center hole.
4. Place the sausage gun over the O-ring gasket.
5. Simultaneously push down on the back of the handle, pressing the thumb release down, while pulling back on the rod.
6. Remove the sausage gun from the bucket and place the end cap and cone on the front of the barrel.
How To Use The Sausage Gun As A Bulk Gun (Without A Follow Plate):
1. To open the metal bucket, use the pail lid opener to pry the tabs up.
2. Remove the plastic or any other sealant.
3. Spray the front of the barrel with WD-40.
4. Push the rod all the way down.
5. Drop the front end of the gun into the material about an inch below the surface.
6. Move it around to make sure there are no air pockets.
7. Simultaneously push down on the back of the handle, pressing the thumb release down, while pulling back on the rod. Draw it up slowly and every so often, wiggle the gun to ensure that the barrel is below the surface.
8. Remove the gun from the material, clean off the barrel, and screw the end cap and cone on the front of the barrel.