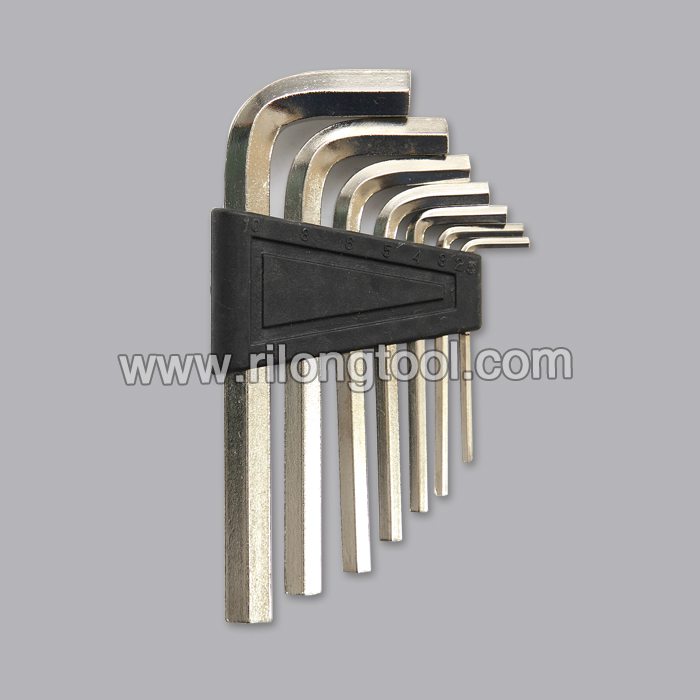
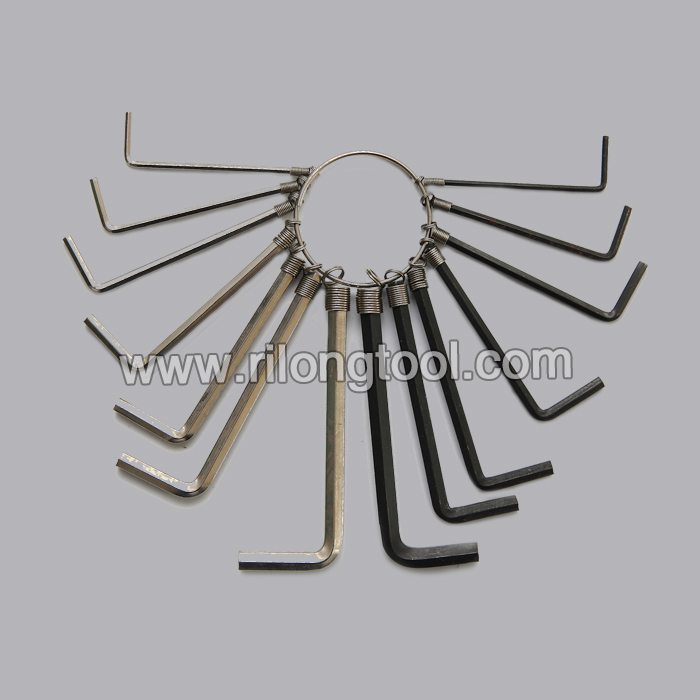
Factory source manufacturing 14-PCS Hex Key Sets packaged by spring ring to Ecuador Factories
Short Description:
Product Detail
Product Tags
We have a highly efficient team to deal with inquiries from customers. Our goal is "100% customer satisfaction by our product quality, price & our team service" and enjoy a good reputation among clients. With many factories, we can provide a wide range of Factory source manufacturing 14-PCS Hex Key Sets packaged by spring ring to Ecuador Factories, We sincerely welcome you come to visit us. Hope we have good cooperation in the future.
Basic Information
■Model Number: RL-NLJ003
Additional Information
■Material: 45# Carbon Steel
■Size: 1/16″-3/8″, 1.5mm-10mm
■Surface Treatment: Zinc-plated, Black Oxide
■Heat Treatment: Optional
■Package: Spring Ring + Suction Card
■OEM: Acceptable
■HS Code: 8204110000
■Samples: For FREE
■Delivery Time: Always 30 working days depending on the order quantity
■Packing: By standard cartons
Product Description
■Ningbo Rilong Hardware Tools Factory can provide various kinds of Hex Key with different sizes and packages.
Product Image
Компания HTT (www.htt-tools.com) представляет новые модели саморегулирующихся зажимов. Они позволяют втрое сократить время при работе с деталями различных диаметров. Изготовлены из высококачественной хром-ванадиевой стали, имеют литой кованный корпус, антикоррозийную обработку поверхности.
Новые модели саморегулирующихся зажимов просты, надёжны и удобны в работе.
Watch the full episode: https://www.youtube.com/watch?v=to4dzxaRUlw
Electrician Scott Caron hangs a flat-panel TV on the wall and conceals all the wiring. (See below for a shopping list, tools, and steps.)
Click here to SUBSCRIBE to the official This Old House YouTube channel: https://www.youtube.com/subscription_center?add_user=thisoldhouse
Shopping List for Hanging a Flat-Screen TV:
- TV wall-mounting bracket
- Old-work electrical box, for housing the recessed electrical outlet
- Recessed electrical outlet, used to provide power to the TV
- Two low-voltage rings with cover plates, for housing the audio-visual cables
- Nonmetallic electrical cable, provides power to the recessed electrical outlet
- Audio-visual cables, connects the TV to the cable box and DVD player
- Electrical tape, used to secure the cables to the fish tape
- Cable staples, for fastening the cables to the floor joists in the basement
- Infrared (IR) repeater and admitter, allows the TV remote control to operate the cable box and DVD player
- Lag screws, for securing the TV wall-mounting bracket to the wall studs
Tools List for Hanging a Flat-Screen TV:
- Utility knife or drywall saw, for cutting holes in walls
- Wire strippers, used to cut and strip wires
- Needle-nose pliers, used to break the tab off the electrical box
- Fish tape, for fishing wires through walls
- Screwdriver
- Hammer
- Drill/driver
Steps for Hanging a Flat-Screen TV:
1. Hold an old-work electrical box against the wall directly above an existing electrical outlet.
2. Trace the outline of the box onto the wall, then use a utility knife (or a drywall saw) to cut a hole through the drywall.
3. Repeat the previous steps to cut a hole for a low-voltage ring that will house the audio-visual cables.
4. Turn off the electrical power to the wall outlet.
5. Remove the cover plate from the outlet and unscrew and pull the outlet from the outlet box. Don’t disconnect any wires.
6. Use needle-nose pliers to twist off the tab from the upper corner of the outlet box.
7. Push a length of nonmetallic electrical cable into the outlet box and up the wall to the hole cut earlier in Step 2.
8. Connect one end of the cable to the recessed electrical outlet, and connect the opposite end to the existing electrical outlet.
9. Install a low-voltage ring to the hole cut in Step 3.
10. Use a fish tape to pull audio-visual cables up from the basement and through the low-voltage ring.
11. Pull the ends of the audio-visual cables through a cover plate, then screw the plate to the low-voltage ring.
12. Extend the audio-visual cables from the TV location to the location of the cable box and DVD player.
13. Cut a hole in the wall near the cable-box location and install a second low-voltage ring.
14. Pull the audio-visual cables up from the basement and through the low-voltage ring.
15. Attach an infrared (IR) repeater to the TV.
16. Mount an infrared (IR) admitter to the IR window on the cable box and on the DVD player.
17. Make the audio-visual cable connections to the cable box and DVD player.
18. Screw the TV wall-mounting bracket to the wall studs and to the back of the TV using lag screws.
19. Hang the TV onto the the wall-mounting bracket.
20. Connect the wires to surround-sound speakers, then mount the speakers to the wall.
21. Turn the power back on.
Follow This Old House and Ask This Old House:
Facebook: https://www.facebook.com/ThisOldHouse
Twitter: https://twitter.com/thisoldhouse
https://twitter.com/asktoh
Pinterest: https://www.pinterest.com/thisoldhouse/
G+: https://plus.google.com/+thisoldhouse/posts
Instagram: https://instagram.com/thisoldhouse
Tumblr: https://thisoldhouse.tumblr.com/