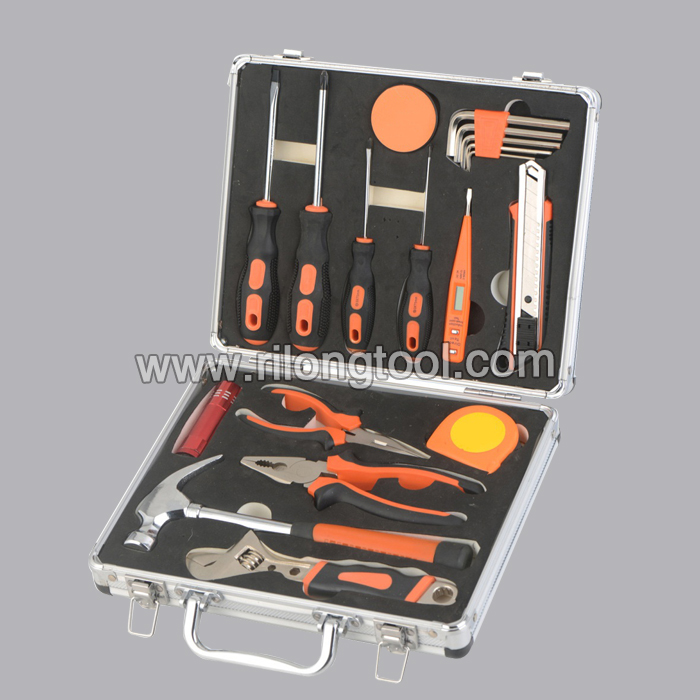
Factory provide nice price 14pcs Hand Tool Set RL-TS009 Supply to Lyon
Short Description:
Product Detail
Product Tags
"Sincerity, Innovation, Rigorousness, and Efficiency" is the persistent conception of our company for the long-term to develop together with customers for mutual reciprocity and mutual benefit for Factory provide nice price 14pcs Hand Tool Set RL-TS009 Supply to Lyon, We sincerely welcome both foreign and domestic business partners, and hope to work with you in the near future!
Basic Information
■Model Number: RL-TS009
Additional Information
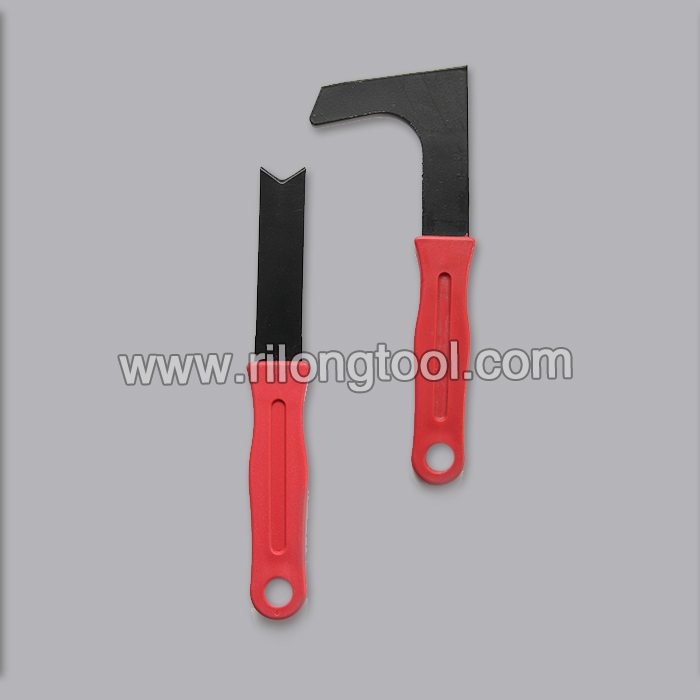
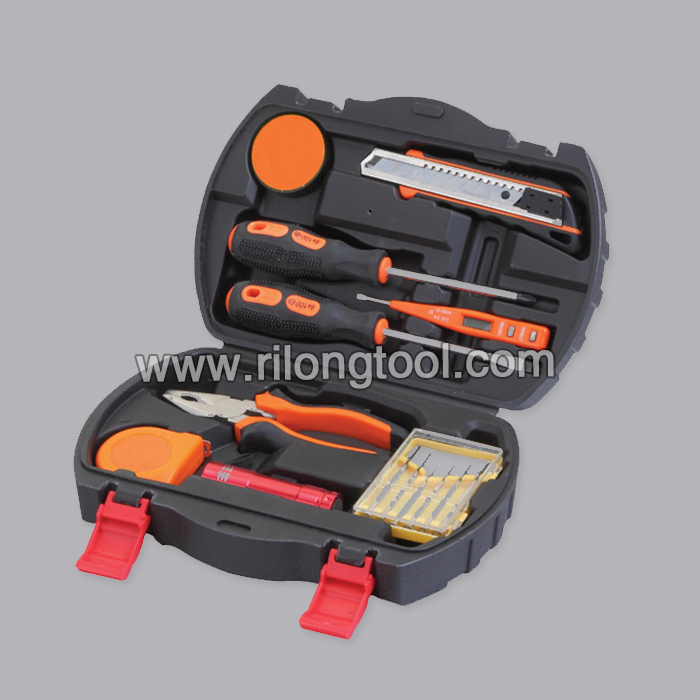
■Content:
| LED flashlight | 1pcs |
| Cutting plier | 1pcs |
| Precision screwdriver | 6pcs |
| Screwdriver | 2pcs |
| Knife | 1pcs |
| Electroprobe | 1pcs |
| Proof fabric | 1pcs |
| Tape measure | 1pcs |
■Package: BMC
■OEM: Acceptable
■Samples: 3 times of the original cost, and you need to afford the express cost
■Delivery Time: Always 30 working days depending on the order quantity
■Packing: By standard cartons
Product Description
■The hand tool set is hand-held, and it is very convenient.
Product Image
https://www.ereplacementparts.com/outer-spool-and-eyelet-assembly-retainer-p-283427.html?q=791-181457 Click here for more information on this part, installation instructions and more.
This particular outer spool assembly is specific to Ryobi manufactured brands, including Ryobi, Troy-Bilt, Yard Man, Bolens, and MTD. To find an outer spool specific to your model, visit eReplacementParts.com.
If your Ryobi string trimmer is showing any of these symptoms; replacing the outer spool and eyelet assembly could solve your problem:
1) Reel and line assembly falls out of trimmer head
2) Entire spool assembly falls off of the shaft
3) Outer spool is cracked or broken
4) Eyelets damaged or missing
5) Slider springs won’t stay in the head
6) Entire trimmer head is loose on the housing shaft
eReplacementParts.com part number: 791-181457
Tools used for this repair/replacement:
1) Pick or small screwdriver
2) Split-ring pliers
3) Long-nosed pliers
4) Rubber mallet
5) Retainer ring installation tool (or a metal tube or pipe that is slightly larger in diameter than the bushing housing drive spindle
Get model-specific repair help from eReplacementParts.com. Learn how to troubleshoot, diagnose and repair your power tools and equipment with illustrated instructions, hundreds of step-by-step repair videos, and our DIY forum. If you have a power tool or appliance problem, we can help. https://www.ereplacementparts.com/articles-c-8873.html
[ VIDEO TRANSCRIPT ]
Hi, I’m Mark from eReplacementParts.com. In this video, I’m going to show you how to replace the outer spool and eyelet assembly on a Ryobi trimmer. The outer spool and eyelet assembly consists of the spool itself, as well as the eyelet that the trimmer line passes through. It has these mounting locations as well for the springs, for the trimmer head slider.
Because it comes in contact with the ground, there’s many ways that this spool can fail. It can just simply wear away, or it might crack. Also, damage can occur to these locations where the springs mount. Replacing the spool and eyelet assembly is easy to do, and I’m going to show you how. Spool and eyelet assemblies, as well as many other parts, can be found on our website. Let’s get started.
I’ll begin by removing the bump head knob and the spool. I’ll use a small pick to pull the C-clip away from the shaft. Now remove the plunger and the plunger spring. Now remove the E-clip, the slider and the two slider springs.
I’ll use a pair of split ring pliers to do that. Now remove the retaining clip that secures the trimmer head to the shaft. This part is not reusable so you don’t have to be real careful when you’re removing it. I like to pry it away with a pick and then use pliers or even a cutter to pull it away from the shaft if necessary. This one’s going to come off pretty easily.
Now I can remove the outer spool from the shaft. The plastic outer spool is pressed onto a metal nut on the back side. To remove it, I’ll strike the end of the shaft with a rubber mallet. You don’t want to use a steel hammer here, because you will bend and damage the shaft.
Now I can install the outer spool. I’ll slide it over the shaft, making sure to line up this recess portion on the back with the nut on the shaft. Once I have those aligned, I’ll tap the spool onto the nut. Now install a new outer spool retainer. I slide the retainer over the shaft. To install it, I’m going to use a special tool that I have. This tool has an inner diameter that’s just slightly bigger than the diameter of the shaft. You probably won’t be able to find a tool like this, but a piece of metal tubing that has the same inner diameter will work great. I slide the tubing over the shaft and then tap the retainer into place.
And now install the thrust washer. Now install the two slider springs back into the outer housing. Now the slider, and this gets secured with the E-clip. Now install the plunger spring and the plunger. You’ll notice that there are some angled faces on the plunger. There are also angled faces on the slider, and I want to align those two together. Once in place, I’ll press the plunger in and secure it with a C-clip.
[ END TRANSCRIPT ]
Mitch.