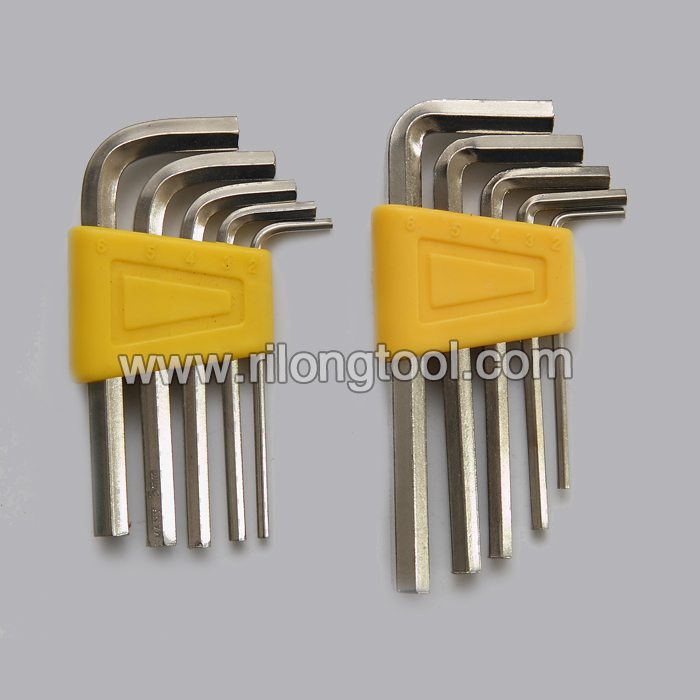
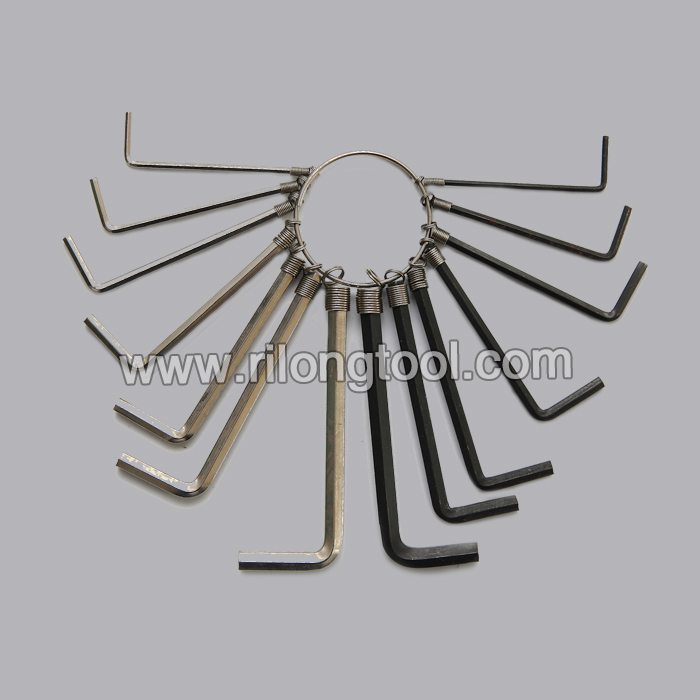
Factory Price For 14-PCS Hex Key Sets packaged by spring ring to Madras Manufacturer
Short Description:
Product Detail
Product Tags
we can offer high quality products, competitive price and best customer service. Our destination is "You come here with difficulty and we give you a smile to take away" for Factory Price For 14-PCS Hex Key Sets packaged by spring ring to Madras Manufacturer, We will supply best quality, the most market competitive price, for every new and old customers with the most perfect green services.
Basic Information
■Model Number: RL-NLJ003
Additional Information
■Material: 45# Carbon Steel
■Size: 1/16″-3/8″, 1.5mm-10mm
■Surface Treatment: Zinc-plated, Black Oxide
■Heat Treatment: Optional
■Package: Spring Ring + Suction Card
■OEM: Acceptable
■HS Code: 8204110000
■Samples: For FREE
■Delivery Time: Always 30 working days depending on the order quantity
■Packing: By standard cartons
Product Description
■Ningbo Rilong Hardware Tools Factory can provide various kinds of Hex Key with different sizes and packages.
Product Image
https://www.ereplacementparts.com/primer-and-hose-assembly-p-282388.html Click here for more information on this part, installation instructions and more.
This particular primer bulb is specific to Ryobi manufactured brands, including Ryobi, Troy-Bilt and Bolens. To find a primer bulb and hose specific to your model, visit eReplacementParts.com.
If your string trimmer is showing any of these symptoms; replacing the primer bulb and hose could solve your problem:
1) Engine not starting easily
2) Fuel leaking from primer bulb
3) Fuel leaking from primer hose
4) Primer bulb cracked or damaged
5) Engine not priming
eReplacementParts.com part number: 791-683974B
Tools used for this repair/replacement:
1) Receptacle for draining fuel
2) Long-nosed pliers
3) Screwdriver
Get model-specific repair help from eReplacementParts.com. Learn how to troubleshoot, diagnose and repair your power tools and equipment with illustrated instructions, hundreds of step-by-step repair videos, and our DIY forum. If you have a power tool or appliance problem, we can help. https://www.ereplacementparts.com/articles-c-8873.html
[ VIDEO TRANSCRIPT ]
Hi, I’m Mark from eReplacementParts.com. In this video, I’m going to show you how to replace the primer and hose assembly on a Ryobi trimmer. The primer bulb pumps fresh fuel into your trimmer’s carburetor, making it easy to start. As with any component of your trimmer’s fuel system, the primer bulb will eventually deteriorate and wear out because of its constant exposure to fuel.
The primer bulb kit includes the bulb and a new piece of fuel line. Replacing the primer bulb is easy to do, and we are going to show you how. Primer bulbs, as well as many other parts, can be found on our website. Let’s get started.
I’ll begin by removing the rear cover. Now remove the two screws that secure the carburetor to the engine. Now I can pull the carburetor away and twist it up while removing the throttle cable.
Before removing any of the fuel lines from the carburetor or the lines from the tank, you’ll want to make sure that you drain any gas that might still be in the fuel tank. We’ll begin by removing the two fuel lines from the back of the primer bulb. You’ll notice that there’s two different lengths of nipples on the back of the primer. It’s a good idea to take note of which line is connected to which nipple before removing the lines. In this case, the return line between the primer and the fuel tank is connected to the longer nipple, and the line between the carburetor and the primer is connected to the shorter.
So, I’ll go ahead and remove those lines. Now I can remove the primer bulb from the carburetor base. The primer bulb is held in place with two tabs. I’ll squeeze those tabs together and push the primer bulb out of the base. Now I’ll install the primer bulb. The primer bulb will only fit into the base one direction. You’ll notice that there’s a tab around the shorter nipple, and that tab lines up with the slot on the base. So I’ll just snap that into place.
The primer bulb kit includes a small piece of fuel line, and that line goes between the primer and the carburetor. So I’ll go ahead and pull the line away from the carburetor base, and remove it from the carburetor. Now install the line. I’ll slide it onto the nipple on the carburetor and then pass it back through the carburetor back plate, and I’ll install the other end back to the primer bulb.
Remember, the line between the carburetor and the primer bulb attaches to the short nipple on the primer. And I’ll reconnect the return line. Now reinstall the throttle cable back onto the carburetor’s throttle linkage, and I’ll secure the carburetor as well as the choke plate with the screws. As I tighten the upper screw, I want to make sure I have the choke plate lined up, as well the wavy washer, so it doesn’t get pinched by the screw. And now I’ll reinstall the rear cover with the air filter.
That’s all it takes to replace the primer bulb and fuel line kit on your Ryobi trimmer. If you found this video helpful, be sure to give us a thumbs-up and leave a comment.
[ END TRANSCRIPT ]
In this video I give you a quick overview of the method I use when I am trying to keep as much width and thickness to a board when it is affected by cupping and twist.
For more woodworking related content visit and like
https://www.JordsWoodShop.com
https://www.facebook.com/JordsWoodShop
https://www.twitter.com/JordsWoodShop