China Gold Supplier for 4-PCS Backhand Locking Pliers Sets for Russia Manufacturers

Short Description:
Product Detail
Product Tags
Fast and good quotations, informed advisers to help you choose the correct product that suits all your needs, a short production time, responsible quality control and different services for paying and shipping affairs for China Gold Supplier for 4-PCS Backhand Locking Pliers Sets for Russia Manufacturers, We, with open arms, invite all interested buyers to visit our website or contact us directly for further information.
Basic Information
■Model Number: RL-DLQ029
Additional Information
■Material: A3# steel (Q235) or 45# steel
■Size: 5”, 6.5″, 7″, 10″
■Surface Treatment: Nickel-plated, Zinc-plated, Black Oxide, Electrophoresis
■Heat Treatment: Optional
■Package: Blister Card, Suction Card, Double Blister Card
■OEM: Acceptable
■HS Code: 8203200000
■Samples: For FREE
■Delivery Time: Always 30 working days depending on the order quantity
■Packing: By standard cartons
Product Description
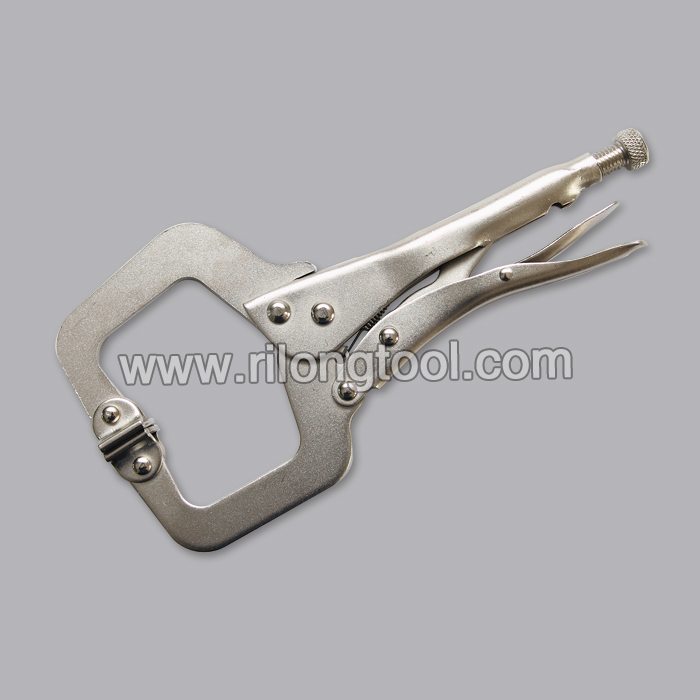
■Mainly used for clamping parts to rivet, weld, grind and so on, which is characterized by the powerful clamp force produced by the jaw. It can lock tight so that the parts won’t fetch away. Besides, jaws have a lot of levels to adjust for the use of different thickness of parts, and it also can be used as a wrench.
■Flexible using, long life and good tenacity.
■The screw tuning button can give the best clamp size easily.
Product Image
Wiha 66992 MagicRing Ball End Hex L-Key Set In Holders 22 Piece – Large Hex.
For more details please visit: https://po.st/fCUI3k Thank You!
Great Wiha 66992 MagicRing Ball End Hex L-Key Set In Holders Review
Wiha 66992 MagicRing Ball End Hex L-Key Set In Holders For Sale
Wiha 66992 MagicRing Ball End Hex L-Key Set In Holders Unboxing
Review Wiha 66992 MagicRing Ball End Hex L-Key Set In Holders Product
https://www.youtube.com/watch?v=rMu6pHGKq60
Our house central vacuum quit working. It wasn’t hard to find the problem as there was smoke billowing out of the motor. I got a part number off the old motor and Googled it. Turns out it was a pretty common vacuum motor and I was able to find a replacement that was maybe a little better than the one that blew up. I highly recommend the people I got this one from, they were really nice and knowledgeable and they had about the cheapest price I could find. The motor came in a couple of days and it was just like what they represented. If you want to order one just like the one in the video, click this link: https://www.centralvacuumonline.com/products/vacuflo/motors/motormodels/117549-lamb-ametek-motor/.
To change the motor you’ll need a step stool, a 1/4″ and 11/32″ socket, a phillips head screwdriver, a set of electrical connectors (the new motor doesn’t come with them), a crimping device or vise grips and a set of pliers. The very first thing to do is unplug the vacuum from the wall.
The top comes off the central vac by removing a 1/4″ set screw and tilting it back. There are three wires to remove, that connect the motor to the vacuum, a black one, a white one, and then a ground, and it’s held on with an 11/32nds nut. Then comes the toughest part, and that’s getting that cussed vacuum hose disconnected. You’ll need the Phillips screwdriver and once the hose clamp is loosened, there’s quite a bit of twisting and turning (if it’s been on there a while like mine had been) to get the motor away from the hose. Once it’s off the whole motor lifts right out, nothing holding it there but the hose, the wires, suction and gravity..
We have a couple of things to do to the new motor before we reinstall. First, we’ll need to crimp electrical connections on the wires. I got my connections at O’ Reilly Automotive and clamped them on with a pair of vise grips. Then, there are three rubber feet on the old motor that I wanted to reuse. I took the needle nose pliers and compressed the tops of them and they came right out. After squirting them with WD-40 I twisted them right into the new motor and the whole thing was ready to go back together.
Reverse the process to put it back together. Set the motor in the housing, connect the vacuum hose and tighten the hose clamp, and then connect the black, white and ground wire and you’re almost done. Put the lid back on and tighten the set screw, plug it into the wall and test it. You should be good to go.
Hope this video helped…good luck!
Copyright 2017 Tractor Mike, LLC