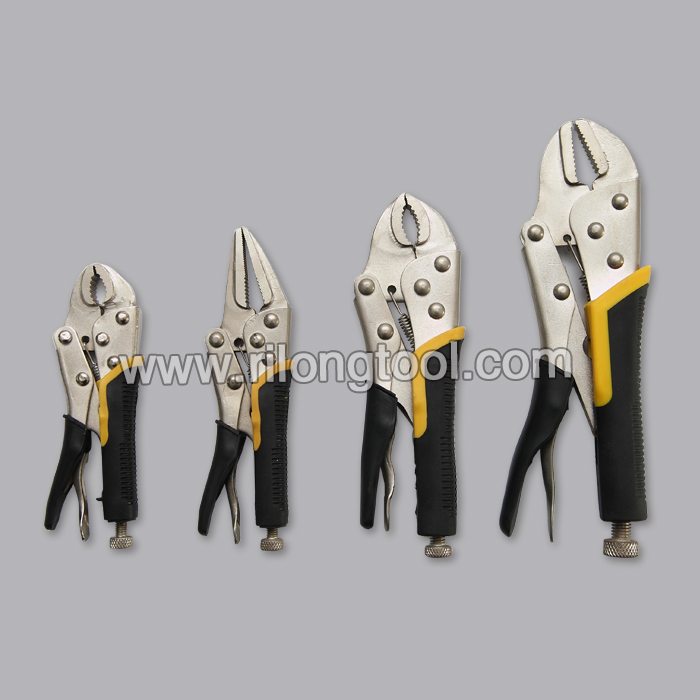
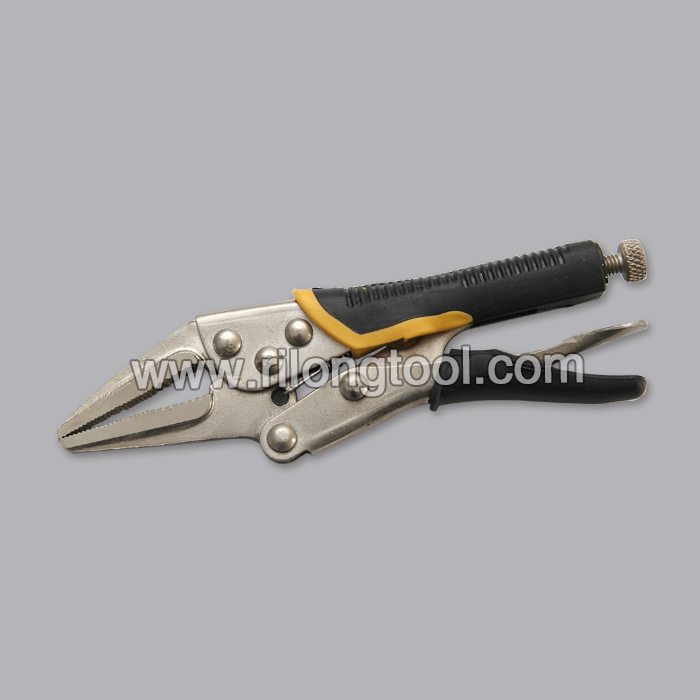
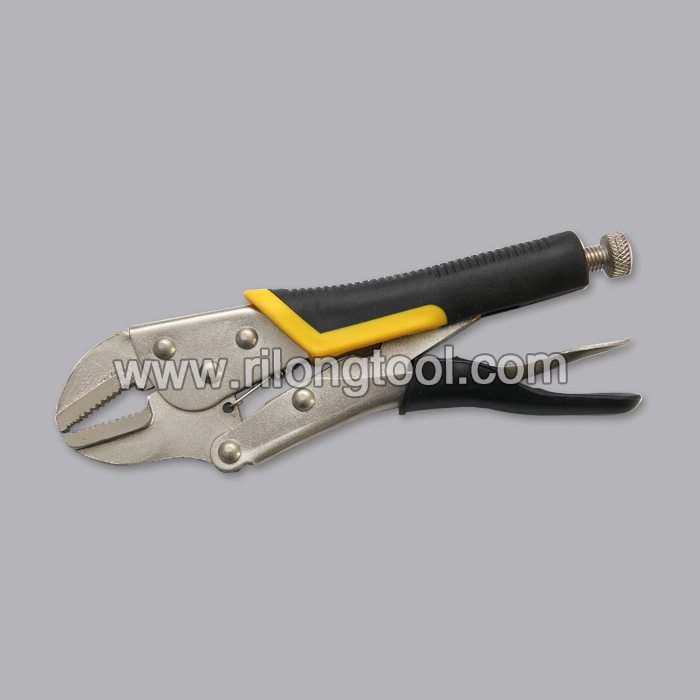
22 Years Factory 10″ Backhand Flat-nose Locking Pliers with Jackets for UAE Factory

Short Description:
Product Detail
Product Tags
Our products are widely recognized and trusted by users and can meet continuously changing economic and social needs for 22 Years Factory 10″ Backhand Flat-nose Locking Pliers with Jackets for UAE Factory, Welcome to set up long-term relationship with us. Best Price For Good Quality in China.
Basic Information
■Model Number: RL-DLQ015
Additional Information
■Material: A3# steel (Q235) or 45# steel
■Size: 10”
■Surface Treatment: Nickel-plated, Zinc-plated, Black Oxide, Electrophoresis
■Heat Treatment: Optional
■Package: Blister Card, Suction Card, Tie Card, Double Blister Card
■OEM: Acceptable
■HS Code: 8203200000
■Samples: For FREE
■Delivery Time: Always 30 working days depending on the order quantity
■Packing: By standard cartons
Product Description
■Mainly used for clamping parts to rivet, weld, grind and so on, which is characterized by the powerful clamp force produced by the jaw. It can lock tight so that the parts won’t fetch away. Besides, jaws have a lot of levels to adjust for the use of different thickness of parts, and it also can be used as a wrench.
■Flexible using, long life and good tenacity.
■The screw tuning button can give the best clamp size easily.
Product Image
https://www.ereplacementparts.com/slider-p-283442.html Click here for more information on this part, installation instructions and more.
This particular slider is specific to Ryobi manufactured brands, including Ryobi, Troy-Bilt, Yard Man, Bolens, and MTD. To find a slider specific to your model, visit eReplacementParts.com.
If your Ryobi string trimmer is showing any of these symptoms; replacing the slider could solve your problem:
1) Bump-feed not working
2) Too much line feeding from trimmer head
3) No line feeding from trimmer head
4) Line feed assembly difficult to activate
eReplacementParts.com part number: 753-04257
Tools used for this repair/replacement:
1) Pick or small screwdriver
2) Split-ring pliers
3) Long-nosed pliers
Get model-specific repair help from eReplacementParts.com. Learn how to troubleshoot, diagnose and repair your power tools and equipment with illustrated instructions, hundreds of step-by-step repair videos, and our DIY forum. If you have a power tool or appliance problem, we can help. https://www.ereplacementparts.com/articles-c-8873.html
[ VIDEO TRANSCRIPT ]
Hi, I’m Mark from eReplacementParts.com. In this video, I’m going to show you how to replace the trimmer head slider on a Ryobi trimmer. The slider is one of the parts inside the trimmer head that controls the amount of line that’s fed out of the head when it’s bumped against the ground. After years of use, it’s possible that the slider can become damaged or worn and will need to be replaced. Replacing it is easy to do, and I’m going to show you how. Sliders, as well as many other parts, can be found on our website. Let’s get started.
I’ll begin by removing the bump head knob and the spool. I’ll use a small pick to pull the C-clip away from the shaft. Now remove the plunger and the plunger spring. Now I’ll remove the E-clip and the slider. I’ll use a pair of split-ring pliers to do that.
Now the slider, and this gets secured with the E-clip. Now I’ll install the plunger spring and the plunger. You’ll notice that there’s some angled faces on the plunger. There are also angled faces on the slider, and I want to align those two together. Once in place, I’ll press the plunger in and secure it with the C-clip.
Now I’ll install the spool. The spool comes pre-packaged with trimmer line already on it. And often the two lines are twisted together, and this is just for shipping. So, what I want to do is pull the lines away from each other, so I have them extending out both sides of the trimmer head. You’ll notice there’s these clips on either side of the head, and those are to temporarily hold the line while we insert the spool into the trimmer head.
So, I’ll lineup each of the trimmer lines with the eyelets on the trimmer head, and then slide the head over the shaft. Once in place, I’ll give a tug on the lines, and that’s to pull them away from those temporary clips. And now I’ll secure the spool with the bump head knob. Because of the spring on the knob, you’ll need to press in as you secure it.
And that’s how you replace the trimmer head slider on the Ryobi Trimmer. If you found this video helpful, be sure to give us a thumbs-up, and leave a comment.
[ END TRANSCRIPT ]
Alex Garami from the KNIPEX UK team explains KNIPEX range of Water Pump Pliers.