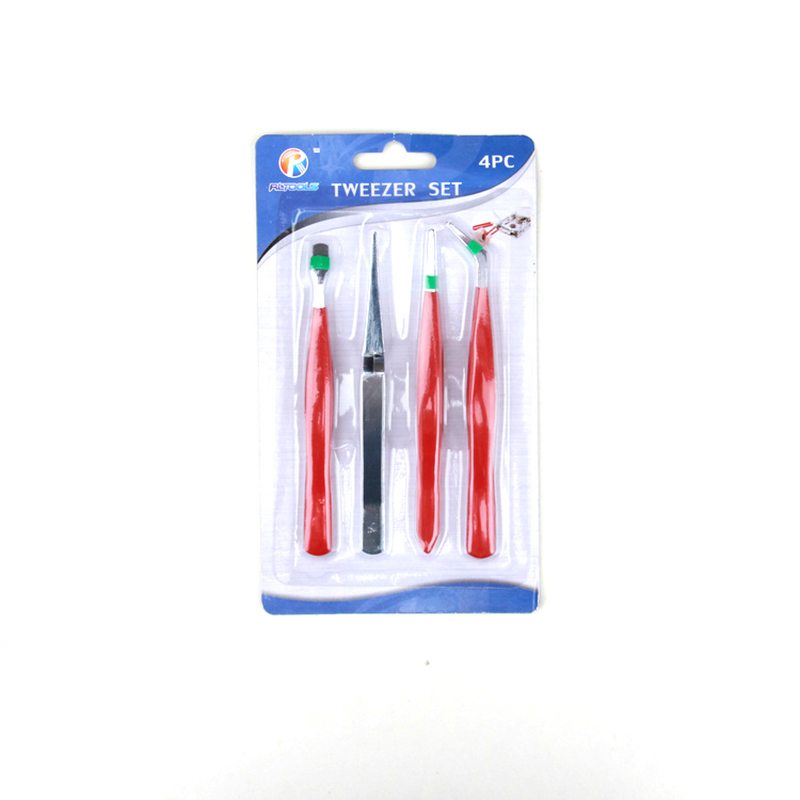
19 Years manufacturer 4-PCS Anti-static Tweezer Sets Russia Manufacturers
Short Description:
Product Detail
Product Tags
Gaining customer satisfaction is our company's aim forever. We will make great efforts to develop new and top-quality products, meet your special requirements and provide you with pre-sale, on-sale and after-sale services for 19 Years manufacturer 4-PCS Anti-static Tweezer Sets Russia Manufacturers, We welcome you to join us in this path of creating a prosperous and efficient business together.
Basic Information
■Model Number: RL-NZ004A
Additional Information
■Material: Q195 Cold-rolled Steel
■Thickness: 0.8mm, 1.0mm, 1.2mm
■Surface Treatment: Chrome Plated
■Finish: Polished
■Package: Suction Card
■OEM: Acceptable
■HS Code: 8203200000
■Samples: For FREE
■Delivery Time: Always 30 working days depending on the order quantity
■Packing: By standard cartons
Attention
■Do not heat it.
■Do not take acid drugs with it.
■Keep it clean after using it.
Product Image
https://www.ereplacementparts.com/small-spring-p-283430.html Click here for more information on this part, installation instructions and more.
This particular slider spring is specific to Ryobi manufactured brands, including Ryobi, Troy-Bilt, Yard Man, Bolens, and MTD. To find a slider spring specific to your model, visit eReplacementParts.com.
If your Ryobi string trimmer is showing any of these symptoms; replacing the slider spring(s) could solve your problem:
1) Bump-feed not working
2) Slider not returning
3) Too much line feeding from trimmer head
4) No line feeding from trimmer head
5) Line feed assembly difficult to activate
eReplacementParts.com part number: 791-181459
Tools used for this repair/replacement:
1) Pick or small screwdriver
2) Split-ring pliers
3) Long-nosed pliers
Get model-specific repair help from eReplacementParts.com. Learn how to troubleshoot, diagnose and repair your power tools and equipment with illustrated instructions, hundreds of step-by-step repair videos, and our DIY forum. If you have a power tool or appliance problem, we can help. https://www.ereplacementparts.com/articles-c-8873.html
[ VIDEO TRANSCRIPT ]
Hi, I’m Mark from eReplacementParts.com. In this video, I’m going to show you how to replace the slider springs on a Ryobi trimmer. The slider springs install inside of the trimmer head. Their purpose is to apply tension to the slider, which allows line to feed in and out of the trimmer head. Over time, the springs can become worn and lose their tension.
If this happens, it’s not uncommon for the trimmer head to feed excessive line when it’s bumped. Replacing the slider springs is easy to do, and I’m going to show you how. Slider springs, as well as many other parts, can be found on our website. Let’s get started.
I’ll begin by removing the bump head knob and the spool. I’ll use a small pick to pull the C-clip away from the shaft. Now remove the plunger and the plunger spring.
Now remove the E-clip, the slider and the two slider springs. I’ll use a pair of split-ring pliers to do that. Now I’ll install the two slider springs back into the outer housing. Now the slider, and this gets secured with the E-clip. Now install the plunger spring and the plunger. You’ll notice that there are some angled faces on the plunger. There are also angled faces on the slider, and I want to align those two together.
Once in place, I’ll press the plunger in and secure it with the C-clip. Now I’ll install the spool. The spool comes pre-packaged with trimmer line already on it, and often the two lines are twisted together, and this is just for shipping. So, what I want to do is pull the lines away from each other, so I have them extending out both sides of the trimmer head. You’ll notice there’s these clips on either side of the head, and those are to temporarily hold the line while we insert the spool into the trimmer head.
So, I’ll line up each of the trimmer lines with the eyelets on the trimmer head, and then slide the head over the shaft. Once in place, I’ll give a tug on the lines, and that’s to pull them away from those temporary clips. And now I’ll secure the spool with the bump head knob. Because of the spring on the knob, you’ll need to press in as you secure it.
And that’s all it takes to replace the slider springs on your Ryobi trimmer. If you found this video helpful, be sure to give us a thumbs-up, and leave a comment.
[ END TRANSCRIPT ]
Mitch.