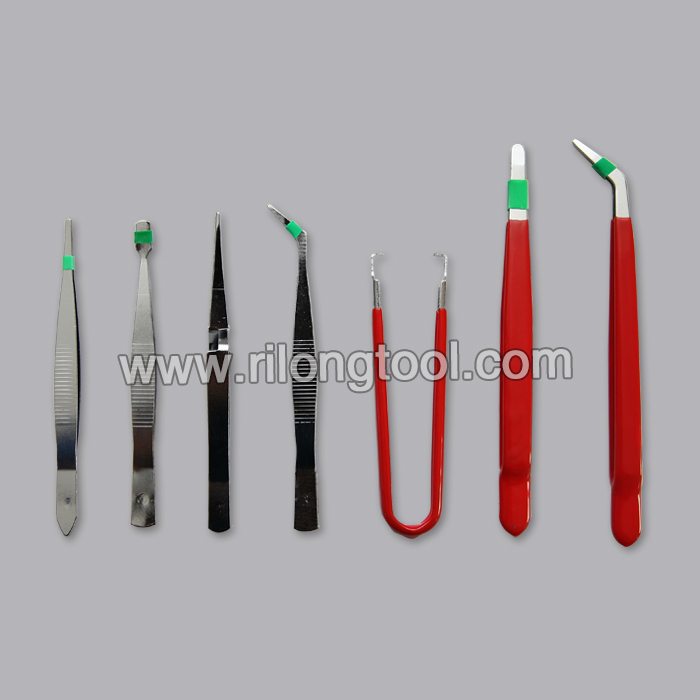
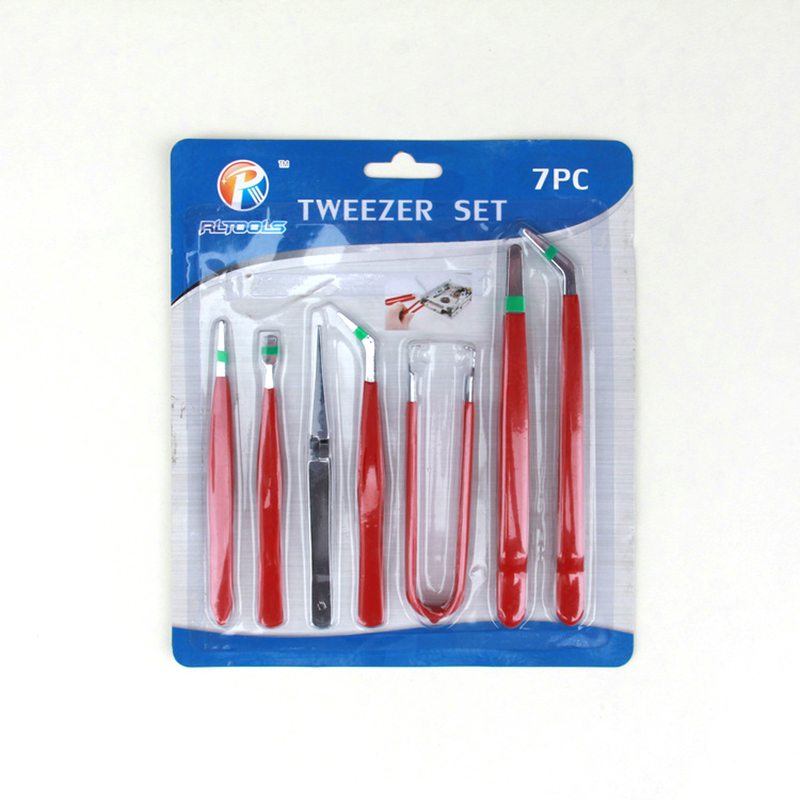
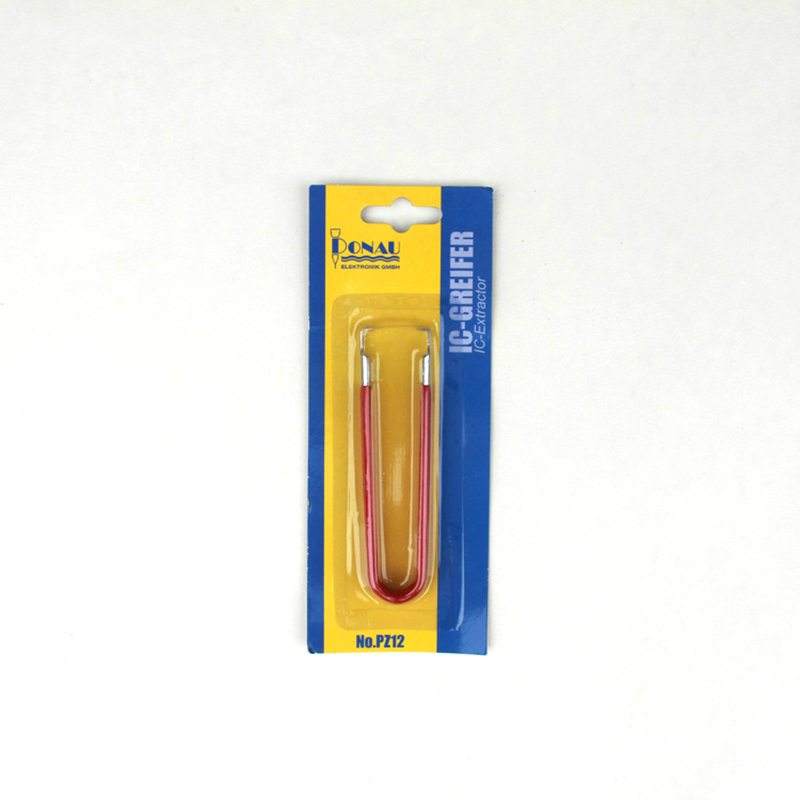
18 Years Factory U-shape small Tweezers Factory in Toronto
Short Description:
Product Detail
Product Tags
"Sincerity, Innovation, Rigorousness, and Efficiency" is the persistent conception of our company for the long-term to develop together with customers for mutual reciprocity and mutual benefit for 18 Years Factory U-shape small Tweezers Factory in Toronto, We warmly welcome all interested customers to contact us for more information.
Basic Information
■Model Number: RL-NZ010A
Additional Information
■Material: Q195 Cold-rolled Steel
■Thickness: 0.8mm, 1.0mm, 1.2mm
■Surface Treatment: Chrome Plated
■Finish: Polished
■Package: Suction Card
■OEM: Acceptable
■HS Code: 8203200000
■Samples: For FREE
■Delivery Time: Always 30 working days depending on the order quantity
■Packing: By standard cartons
Attention
■Do not heat it.
■Do not take acid drugs with it.
■Keep it clean after using it.
Product Image
Joe Schwab demonstrates how to properly “sight-in” Crimson Trace laser sights.
- Adjusting Laser Using Allen Head Screws
Windage and elevation can be adjusted by turning the screws on the top and side of the laser diode. Each screw makes contact with a small post attached at the back of the laser diode. Turning the screw presses on this post and changes the direction of the laser beam. Allen head wrenches are included with every new Crimson Trace Lasergrip.
The Allen head screw at the top changes the elevation (the up or down of the laser movement). The screw on the side allows you to adjust the windage (side movement from left to right). Keep in mind, a little adjustment goes a long way. It is recommended that you make adjustments in no more than quarter-turn increments.
- Step One — Sighting To Iron Sights
The first step to sighting in your Lasergrips is to establish a proper sight picture. That is to align to top of your front sight with the top of your rear sight while having an equal amount of light on either side of the front sight post. The laser, when properly adjusted, will be located just above the front sight post.
-Step Two — Sighting Laser To Point Of Impact
Now that the laser and the iron sights are aligned, further adjustment can be made to ensure the laser aims directly at the point of impact. After test firing the gun with live rounds, it will become evident if the laser needs further adjusting. Using the screws, make small adjustments until the laser dot consistently matches up with the point of impact.
Purchase Crimson Trace at: https://www.lasersightcity.com
This week, your host Kristal Wick is joined by Linda Hartung from Alacarte Clasps and WireLace! She shows Kristal the many ways you can use WireLace and WireLuxe in your jewelry projects. Then, Kristal and Linda take a look at the beauty of Alacarte Clasps’ findings, including clasps and bails. Later, Linda will show you how to make a bail using WireLace. You can find all of the products featured in this episode right here: https://www.artbeads.com/wirelace-artbeads-cafe.html