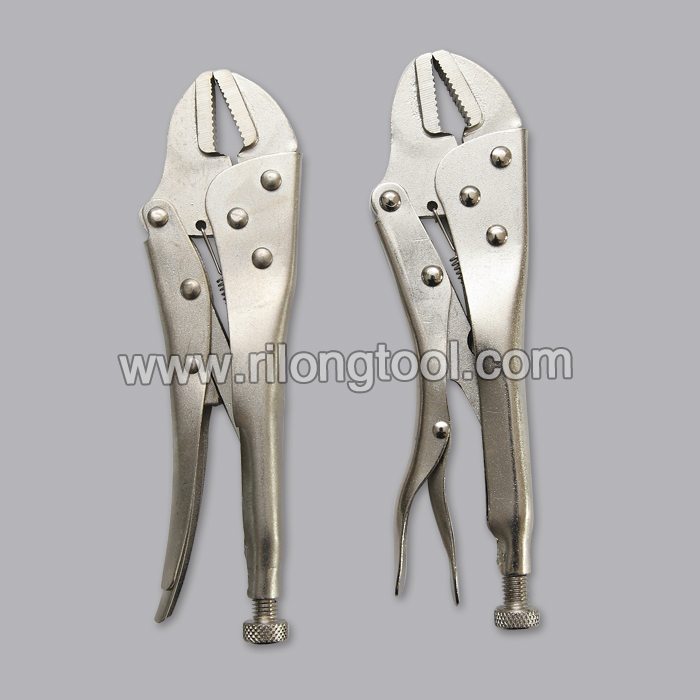
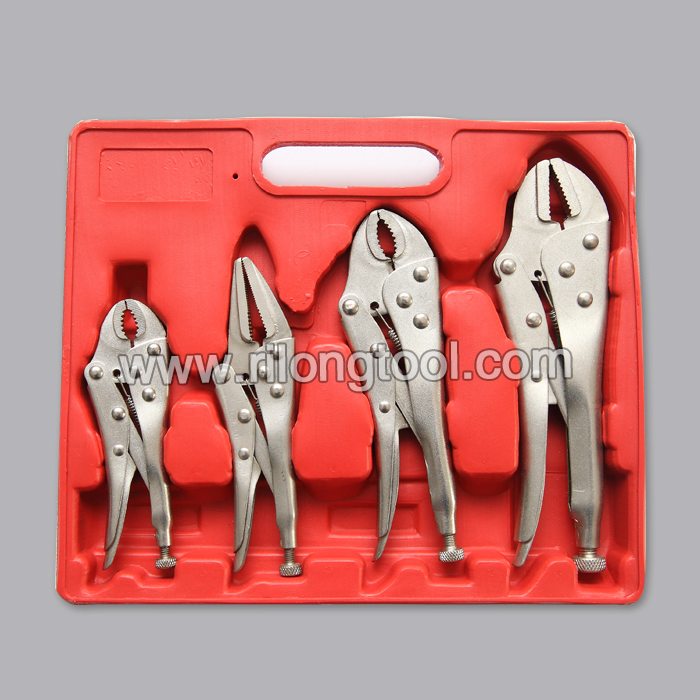
17 Years Factory 4-PCS Locking Pliers Sets packaged by BMC for Bangalore
Short Description:
Product Detail
Product Tags
Our well-equipped facilities and excellent quality control throughout all stages of production enables us to guarantee total customer satisfaction for 17 Years Factory 4-PCS Locking Pliers Sets packaged by BMC for Bangalore, We welcome you to join us in this path of creating a prosperous and efficient business together.
Basic Information
■Model Number: RL-DLQ022
Additional Information
■Material: A3# steel (Q235) or 45# steel
■Size: 5”, 6.5″, 7″, 10″
■Surface Treatment: Nickel-plated, Zinc-plated, Black Oxide, Electrophoresis
■Heat Treatment: Optional
■Package: BMC
■OEM: Acceptable
■HS Code: 8203200000
■Samples: For FREE
■Delivery Time: Always 30 working days depending on the order quantity
■Packing: By standard cartons
Product Description
■Mainly used for clamping parts to rivet, weld, grind and so on, which is characterized by the powerful clamp force produced by the jaw. It can lock tight so that the parts won’t fetch away. Besides, jaws have a lot of levels to adjust for the use of different thickness of parts, and it also can be used as a wrench.
■Flexible using, long life and good tenacity.
■The screw tuning button can give the best clamp size easily.
Product Image
We had a need to cut a 7″ circle out of metal on a sunday and didn’t have access to any stores that sell them, so we made one. It didn’t work as well as planned, but we got it finished up. We used simple tools like angle grinders, hand drills, files, vice grips, and welder. You can kind of call this a DIY drill bit of sorts for drilling large holes in thin metal, steel, aluminum or wood.
This is a DIY circle cutter for metal.
Behind the Scenes Youtube Channel: https://www.youtube.com/channel/UCBpUoiMsRMBg-DHKcFpE6jg
Follow me on Social Media:
Instagram – https://www.instagram.com/ramseycustoms
Facebook – https://www.facebook.com/ramseycustoms
Website – https://www.ramseycustoms.com
Continuing our R6 motorcycle engine rebuild series, in part 2 we tackle the piston install to the head install. Here is a list of the parts you need: https://bit.ly/R6-Parts-List
Need a review? Watch R6 engine rebuild part one (bottom end): https://www.youtube.com/watch?v=A_xjCpcPrvU&list=PLazGjIO6R4vT361OrBqOtpwXf4dmdJ4Nj&index=4
You’ll also need this crankcase diagram for the R6: https://bit.ly/Crankcase-Diagram-R6
In this video, John takes you through installing the pistons for the new R6 636 kit all the way through head installation. See how to install the crankshaft, reunite the crankcase halves, and install the timing chain. Ahead in part 3, we’ll wrap up the assembly process.
To buy OEM Yamaha motorcycle parts, click here: https://www.partzilla.com/parts/search/Yamaha/Motorcycle/parts.html?utm_source=youtube&utm_medium=video&utm_campaign=description_btf
VIDEO HIGHLIGHTS:
Preparing pistons – 1:00
Installing crankshaft – 7:00
Assembling crankcase halves – 10:00
Installing clutch basket – 12:30
Installing oil pan – 13:50
In the video we’re working with a 2008 Yamaha YZF R6, but you may have similar steps for your machine. If you’re not sure whether these steps apply to your motorcycle, leave a comment and we’ll get back to you.
RELATED CONTENT:
Why a 636 kit?
https://youtu.be/O2a8faE0x0k
Yamaha R6 engine teardown:
Yamaha R6 engine rebuild part 3: