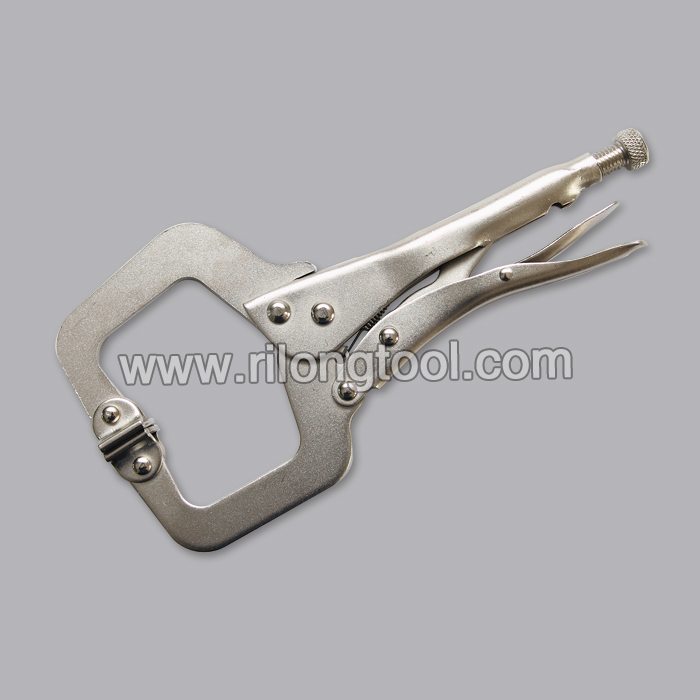
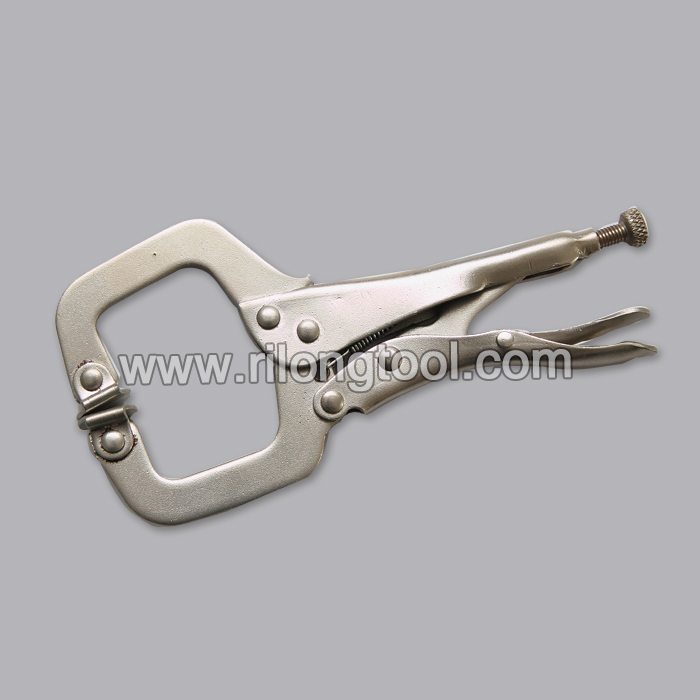
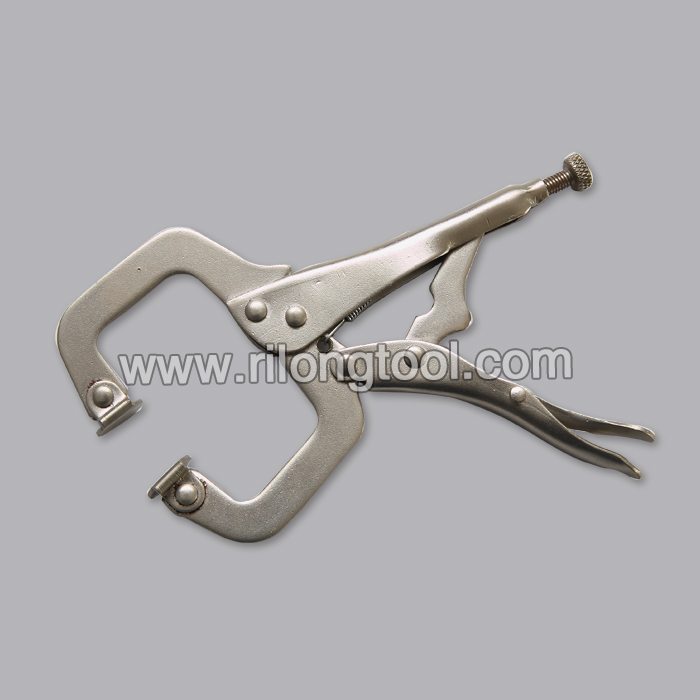
13 Years Factory 9″ C-clamp Locking Pliers Factory in Jersey
Short Description:
Product Detail
Product Tags
With a positive and progressive attitude to customer's interest, our company continuously improves our product quality to meet the needs of customers and further focuses on safety, reliability, environmental requirements, and innovation of
13 Years Factory 9″ C-clamp Locking Pliers Factory in Jersey, We welcome new and old customers from all walks of life to contact us for future business relationships and achieving mutual success!
Basic Information
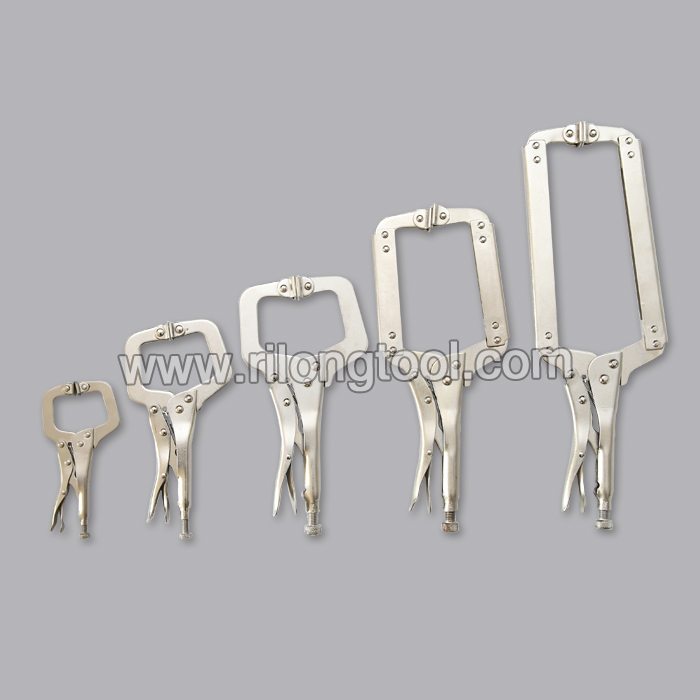
■Model Number: RL-DLQ018
Additional Information
■Material: A3# steel (Q235) or 45# steel
■Size: 9”
■Surface Treatment: Nickel-plated, Zinc-plated, Black Oxide, Electrophoresis
■Heat Treatment: Optional
■Package: Blister Card, Suction Card, Tie Card, Double Blister Card
■OEM: Acceptable
■HS Code: 8203200000
■Samples: For FREE
■Delivery Time: Always 30 working days depending on the order quantity
■Packing: By standard cartons
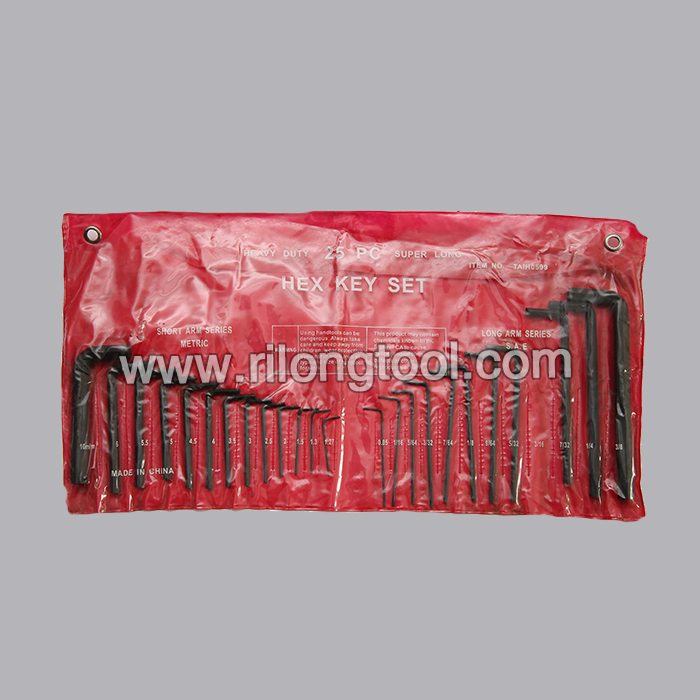
Product Description
■Mainly used for clamping parts to rivet, weld, grind and so on, which is characterized by the powerful clamp force produced by the jaw. It can lock tight so that the parts won’t fetch away. Besides, jaws have a lot of levels to adjust for the use of different thickness of parts, and it also can be used as a wrench.
■Flexible using, long life and good tenacity.
■The screw tuning button can give the best clamp size easily.
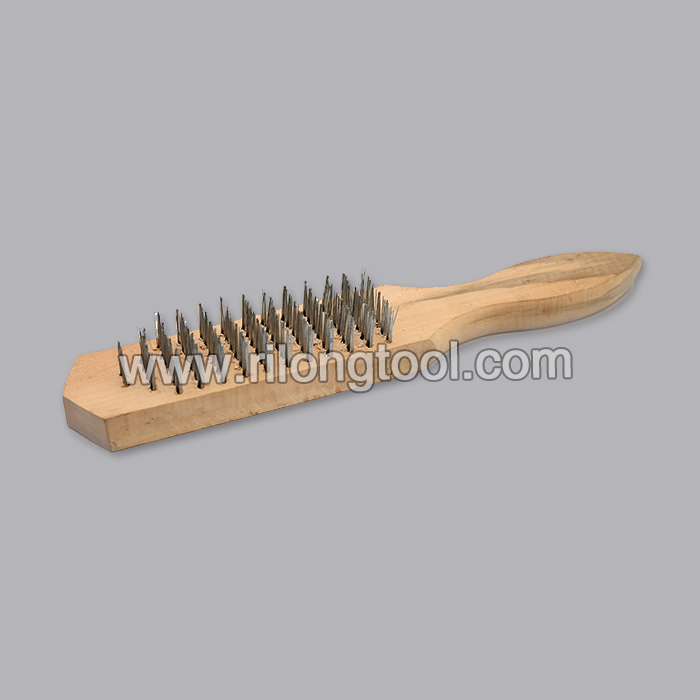
Product Image
A good tip, it’s so easy to gap a spark plug with a channel lock plier. Easy leverage control, fast and simple, you can open and close the gap easily. I gap my spark plugs visually, no need to measure.
https://www.ereplacementparts.com/lower-flexible-drive-shaft-p-282797.html Click here for more information on this part, installation instructions and more.
This particular flexible drive shaft is specific to Ryobi manufactured brands, including Ryobi, Troy-Bilt, Yard Man, and MTD. To find a lower flexible drive shaft specific to your model, visit eReplacementParts.com.
If your Ryobi string trimmer is showing any of these symptoms; replacing the lower flexible drive shaft could solve your problem:
1) Trimmer head not spinning
2) Trimmer head makes noise
3) Engine idles, but head won’t move when throttled
4) Drive shaft ends stripped
5) Flexible cable is kinked or broken
eReplacementParts.com part number: 791-181852
Tools used for this repair/replacement:
1) Pick or small screwdriver
2) Phillip’s screwdriver
3) Split-ring pliers
4) Long-nosed pliers
5) Rubber mallet
6) Wrenches and/or socket set
7) Wheel & chassis grease
8) Retainer replacement tool (or a metal tube or pipe that is slightly larger in diameter than the bushing housing drive shaft)
Get model-specific repair help from eReplacementParts.com. Learn how to troubleshoot, diagnose and repair your power tools and equipment with illustrated instructions, hundreds of step-by-step repair videos, and our DIY forum. If you have a power tool or appliance problem, we can help. https://www.ereplacementparts.com/articles-c-8873.html
[ VIDEO TRANSCRIPT ]
Hi, I’m Mark from eReplacementParts.com. In this video, I’m going to show you how to replace the lower flexible drive shaft in a Ryobi trimmer. The lower flexible drive shaft is mounted inside the tube on your trimmer attachment. Its purpose is to drive the trimmer head. Common problems with the lower flexible drive shaft are the square ends will wear to round, at which point they’ll no longer drive. It’s also possible the damage to the cable if the trimmer head is stopped very rapidly. This can cause the cable to kink or even break.
Replacing the lower flexible drive shaft is easy to do, and I’m going to show you how. Lower flexible drive shafts, as well as many other parts, can be found on our website. Let’s get started.
I’ll begin by removing the bump head knob and the spool. I’ll use a small pick to pull the C-clip away from the shaft. Now remove the plunger and the plunger spring. Now remove the E-clip, the slider, and the two slider springs. I’ll use a pair of split ring pliers to do that. Now remove the retaining clip that secures the trimmer head to the shaft. This part is not reusable, so you don’t have to be real careful when you are removing it. I like to pry it away with a pick, and then use pliers or even a cutter to pull it away from the shaft if necessary. This one’s going to come off pretty easily.
Now I can remove the outer spool from the shaft. The plastic outer spool is pressed onto a metal nut on the back side. To remove it, I’ll strike the end of the shaft with a rubber mallet. You don’t want to use a steel hammer here, because you will bend and damage the shaft. Now remove the bushing housing assembly. First I’ll remove the guard, then the retaining clamp, and the anti-rotation screw.
Next, I’ll loosen the bolt that secures the clamp to the shaft. Now remove the anti-rotation screw and separate the bushing housing assembly from the shaft. And now I’ll remove the lower drive shaft.
Before I install the new motor drive shaft, I’ll lubricate it with a little bit of bearing and chassis grease. A little bit on my finger, and slide that all over the shaft. And now it’s ready to be installed.
You’ll notice that there’s a ring pressed onto one end of the shaft. This is the lower end or the end that goes on the trimmer head. So, I’ll slide the opposite end through the curved portion of the shaft, and insert it until that ring bottoms out, like that.
Now I can install the bushing housing assembly. Before I do though, I want to make sure that I remembered to slide the retaining clamp over the shaft, then the shaft into the bushing housing assembly. Make sure everything lines up, and I’ll secure these two together with the anti-rotation screw and the clamp….
[ Download the entire transcript for this video here: https://www.ereplacementparts.com/article/19228/How_to_Replace_the_Lower_Flexible_Drive_Shaft_on_a_Ryobi_Trimmer.html ]