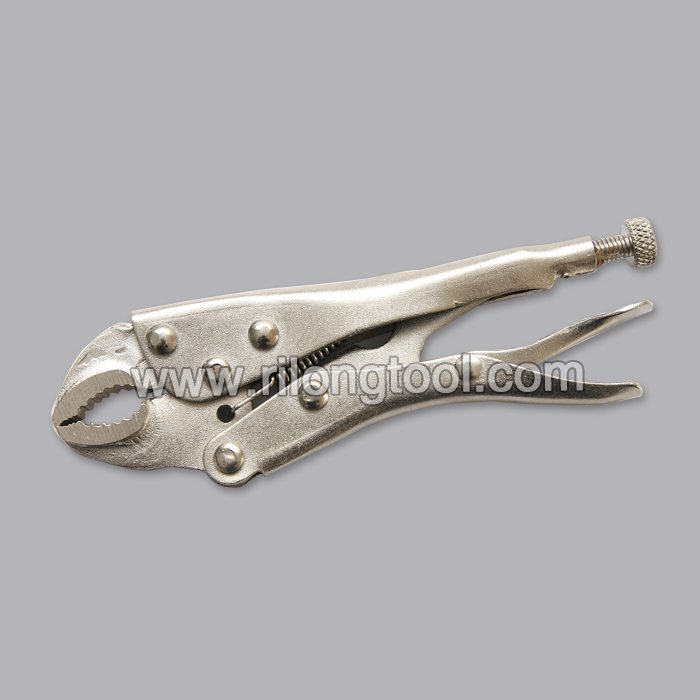
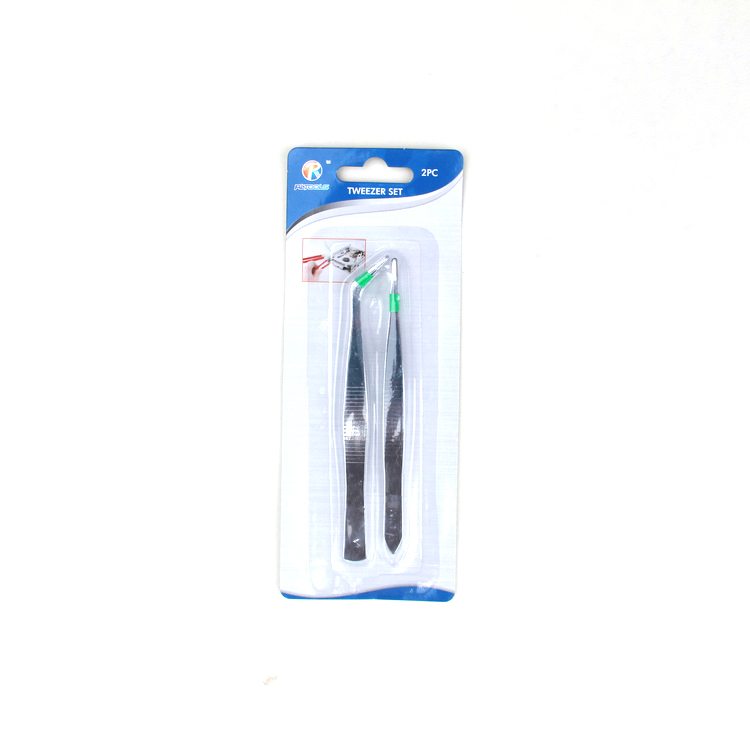
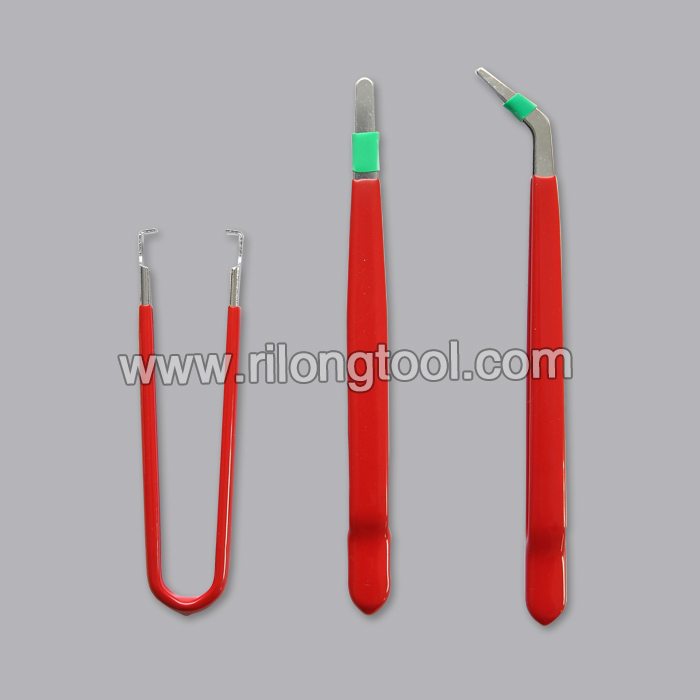
11 Years Factory 3-PCS Anti-static Tweezer Sets for French Manufacturer
Short Description:
Product Detail
Product Tags
We always work as a tangible team to ensure that we can provide you with the best quality and the best price for 11 Years Factory 3-PCS Anti-static Tweezer Sets for French Manufacturer, We will supply best quality, the most market competitive price, for every new and old customers with the most perfect green services.
Basic Information
■Model Number: RL-NZ005
Additional Information
■Material: Q195 Cold-rolled Steel
■Thickness: 0.8mm, 1.0mm, 1.2mm
■Surface Treatment: Chrome Plated
■Finish: Polished
■Package: Suction Card
■OEM: Acceptable
■HS Code: 8203200000
■Samples: For FREE
■Delivery Time: Always 30 working days depending on the order quantity
■Packing: By standard cartons
Attention
■Do not heat it.
■Do not take acid drugs with it.
■Keep it clean after using it.
Product Image
Video tutorial on how to replace the front wheel bearing on a 2 wheel drive 1997 to 2004 Dodge Dakota with a 4.7L V8. When ordering a new wheel bearing, you will also have to order a new locking nut because this particular model uses nylon locking nut which cannot be reused. Other styles use a castellated nut which has a cotter pin to lock it into place rather than using a nylon insert built within the nut. This particular tutorial was done on a 2003 Dodge Dakota 2wd.
Website: https://4diyers.com
Facebook: https://www.facebook.com/4diyers
Google Plus: https://plus.google.com/+4DIYers
Twitter: https://twitter.com/4DIYers
Instagram: https://www.instagram.com/4diyers/
Tumblr: https://4diyers.tumblr.com
Pintrest: https://www.pinterest.com/4diyers/
Tools/Supplies Needed:
-jack
-jack/axle stand
-large slip joint pliers or c clamp
-14mm socket
-21mm socket
-bungie cord
-hammer
-1-3/8″ socket
-ratchet set
-emery paper or an abrasive pad
-degreaser
-rag
-torque wrench
-new spindle lock nut
-new spindle/wheel bearing assembly
Procedure:
-safety raise the vehicle using a jack, support with a jack stand, and remove the wheel
-loosen the master cylinder reservoir so when you depress the pistons in the caliper, it doesn’t build up an access pressure in the system
-remove the two 14mm bolts from the caliper, then depress the pistons while the caliper is in place using a large pair of slip joint pliers or a c-clamp
-once you’ve removed the caliper, tie it into place with a bungie cord so there isn’t any strain on the brake line
-next remove the caliper carrier which is held on by two 21mm bolts on the backside
-once the carrier is removed, remove the rotor next
-if the rotor is stuck on, you can hit the rotor with a hammer in between the lugs to rattle it loose
-now you can remove the hub using a 1-3/8″ socket
-if the hub is slightly stuck on, you can tap the rear with a hammer considering you’ll be replacing the bearing and it doesn’t matter about the old bearings
-you can also use a puller if you wish
-clean the spindle shaft of any rust or grim in order for the new one to fit
-use emery paper or an abrasive pad to clean up the spindle shaft, then wipe clean with a degreaser and rag
-the new hub assembly is a sliding fit setup
-once the hub is in place, you can now install the new locking nylon locking nut (torque spec is 185ft lbs or 251nm)
-caliper slide pin torque specs are 22 ft lbs or 30nm
-assembly in reverse of disassembly
Thank you to all those who watch my videos and support my content. Don’t forget to subscribe to my channel for future tutorial videos and like my video if you found it helpful. New videos are always being uploaded every week!
© 4DIYers 2013
All Rights Reserved
No part of this video or any of its contents may be reproduced, copied, modified or adapted, without the prior written consent of the author.
Learn to replace a pressed wheel bearing in a Ford, specifically a 95 Ford Windstar, but this method will be similar for all pressed bearing vehicles.
The main steps are to take off the spindle nut, tire, brake caliper, and rotor. Then remove the bolts from the lower control arm ball joint, tie rod, and strut. Remove the steering knuckle, then press out the bearing and hub/spindle. Then press in your new bearing and hub/spindle. This job is a little more complex but can still be easily done by any amateur mechanic. You will save $400-1000 depending on your vehicle.
Here is how to Replace a Hub Bearing Assembly (rear wheel drive): https://www.youtube.com/watch?v=04AyCYIUEWQ
Here is how to Replace a Hub Bearing Assembly (front wheel drive): https://www.youtube.com/watch?v=fe_WtKIKlYA
Bearing Press Tool: https://www.amazon.com/gp/product/B00AZABHLQ/ref=as_li_tl?ie=UTF8&camp=1789&creative=390957&creativeASIN=B00AZABHLQ&linkCode=as2&tag=chri0e2-20&linkId=EIBAN5P55H2K2M5C
**If the video was helpful, remember to give it a “thumbs up” and consider subscribing. New videos every Thursday**
-Website: https://www.ChrisFixed.com
-Facebook: https://www.facebook.com/chrisfix8
-Twitter: https://twitter.com/ChrisFixed
-Instagram: https://instagram.com/chrisfixit
-Subscribe Here: https://www.youtube.com/subscription_center?add_user=paintballoo7
-YouTube Channel: https://www.youtube.com/ChrisFix
Disclaimer:
Due to factors beyond the control of ChrisFix, I cannot guarantee against improper use or unauthorized modifications of this information. ChrisFix assumes no liability for property damage or injury incurred as a result of any of the information contained in this video. Use this information at your own risk. ChrisFix recommends safe practices when working on vehicles and or with tools seen or implied in this video. Due to factors beyond the control of ChrisFix, no information contained in this video shall create any expressed or implied warranty or guarantee of any particular result. Any injury, damage, or loss that may result from improper use of these tools, equipment, or from the information contained in this video is the sole responsibility of the user and not ChrisFix.