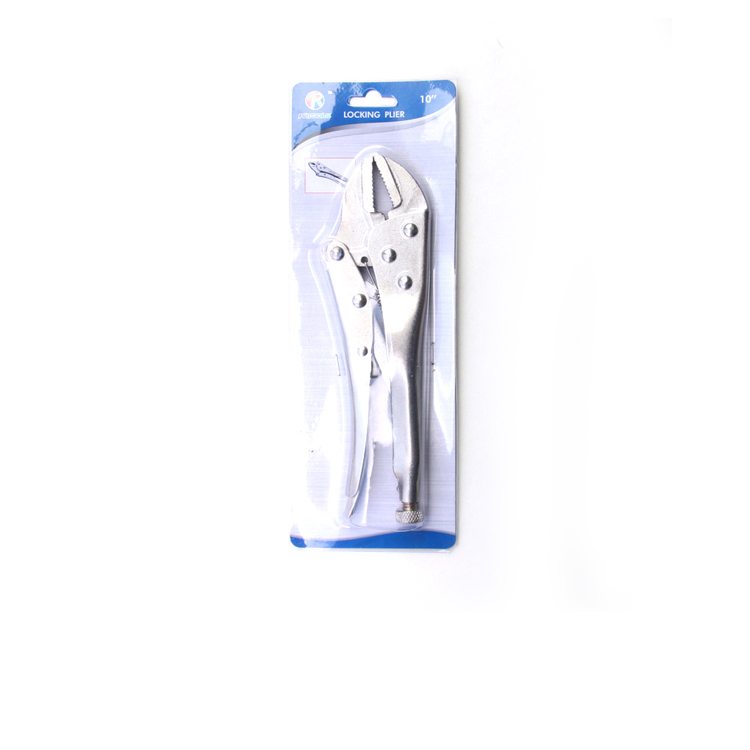
23 Years Factory 10″ Forehand Flat-nose Locking Pliers Serbia Importers
Short Description:
Product Detail
Product Tags
In order to best meet client's needs, all of our operations are strictly performed in line with our motto " High Quality, Competitive Price, Fast Service " for 23 Years Factory 10″ Forehand Flat-nose Locking Pliers Serbia Importers, If you are interested in any of our products or would like to discuss a custom order, please feel free to contact us.
Basic Information
■Model Number: RL-DLQ009A
Additional Information
■Material: A3# steel (Q235)
■Size: 10”
■Surface Treatment: Nickel-plated
■Heat Treatment: Optional
■Package: Suction Card
■OEM: Acceptable
■HS Code: 8203200000
■Samples: For FREE
■Delivery Time: Always 30 working days depending on the order quantity
■Packing: By standard cartons
Product Description
■Mainly used for clamping parts to rivet, weld, grind and so on, which is characterized by the powerful clamp force produced by the jaw. It can lock tight so that the parts won’t fetch away. Besides, jaws have a lot of levels to adjust for the use of different thickness of parts, and it also can be used as a wrench.
■Flexible using, long life and good tenacity.
■The screw tuning button can give the best clamp size easily.
Product Image
Courtesy of: https://www.LarryBloodworthsBlog.com
For more information on this tool, contact:
Kise Transmissions
1469 E 4th Ave, Columbus, OH 43219
Phone: (614) 253-7278
This is an instructional video on the assembly process for the Brodie International (https://www.brodieintl.com) Valve Cylinder Assembly, 2″-4″ valves.
For this project, you’ll need a cylinder, cylinder head, piston, valve spring, seal ring, retaining ring, six retaining head screws, two jack out screws, and five elastomers appropriate for the product.
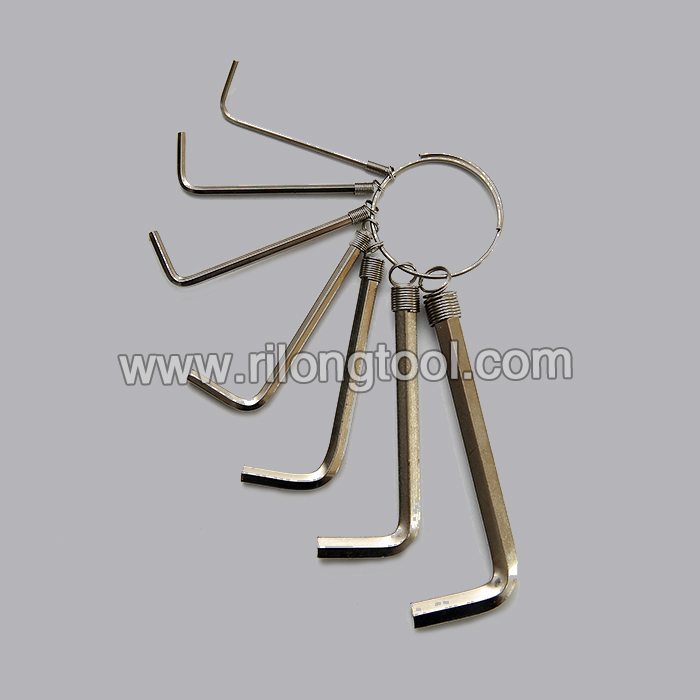
You’ll also need an Allen wrench, channel lock pliers, a suitable elastomer lubricant, a brush, and an extra set of hands.
Start by placing the elastomer inside the cylinder, making sure that it’s seated properly.
Next, lubricate the elastomer. Insert the seal ring into the cylinder, against the elastomer.
Install the retaining ring over the seal ring.
This process can be challenging, it’s important to get the retaining ring seated in the groove.
After the retaining ring is positioned by hand, use a pair of channel lock pliers to carefully seat the ring tightly in the groove. Try not to mar the outside cylinder finish during this process.
After that’s completed, flip the cylinder over. Fit the elastomer over the piston and lubricate.
Carefully place the piston in the cylinder and push the piston until it stops against the seat o-ring.
Then install the valve spring into the cylinder. It should settle easily in the middle of the piston.
Place the elastomer in the groove on the cylinder head and lubricate.
Place the cylinder head on the cylinder.
Then have an assistant press down on the cylinder head as you align the holes.
Use your Allen wrench to install two cylinder head screws.
Once the two head screws are secured, you can do the rest on your own. Install the remaining cylinder head screws tightly.
Again, flip the cylinder over. Install the two exterior elastomers on the cylinder – both are identical – and lubricate prior to assembly in a valve body.
Finally, locate the holes for the jack out screws and install the jack out screws.
These will aid in the extraction of the cylinder assembly from the valve body if required.
Your assembly is complete.